Build package
Build Aero Hand Open
Chestnut Robotics (formerly TetherIA) · Hand · active · 2025
Open-source tendon-driven five-finger hand with 7 actuated DOF (16 joints), fully 3D printed, weighing 389 g, with a Python SDK and ROS2 support.
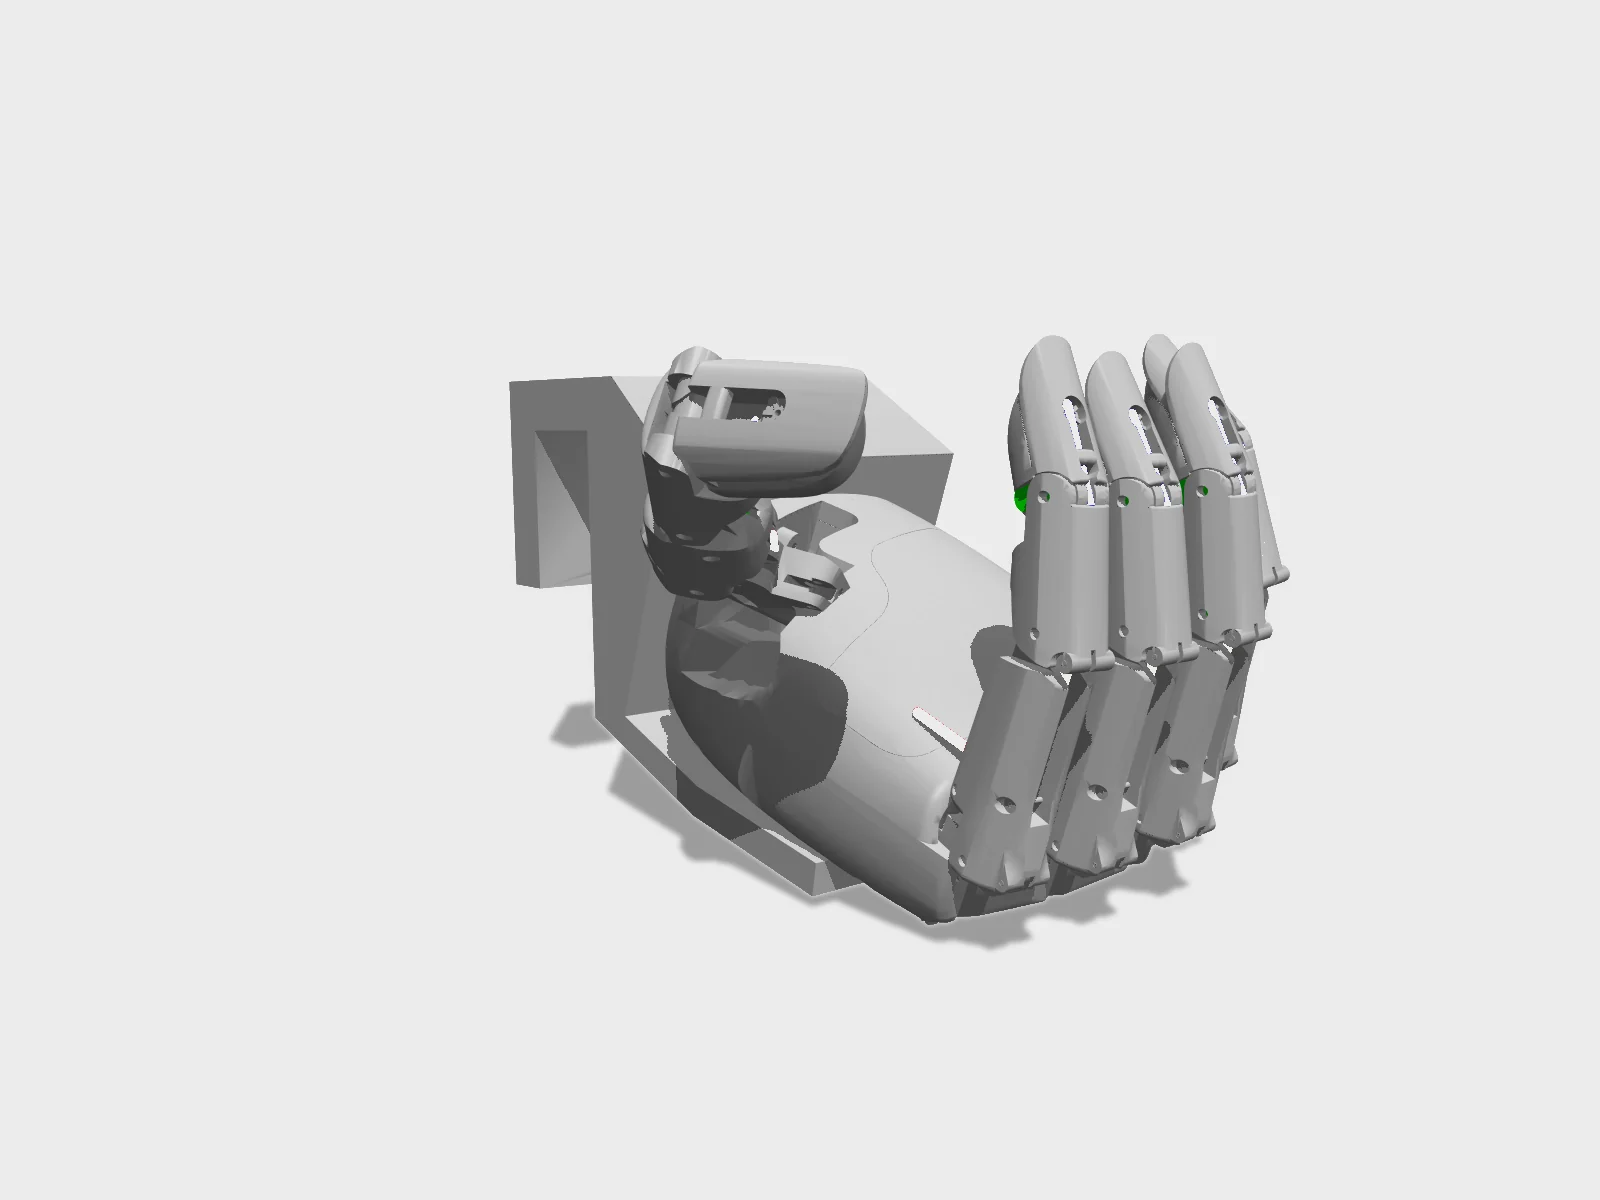
- Drawing
- /chestnut/aero-hand-open
- Maker
- Chestnut Robotics (formerly TetherIA)
- Country
- US
- Package rev
- v0.1.0
- Level
- L2 Sim-verified
- Availability
- Kit
- Openness
- 90/100
- HW licence
- CC-BY-NC-SA-4.0
- Last checked
- 2026-09-25
- Mass
- 0.389 kg
- DOF
- 7
TetherIA rebranded to Chestnut Robotics (GitHub org renamed TetherIA -> Chestnut-Robotics). Design files are non-commercial; commercial manufacturing needs a license.
Configure
Saved in the URL. Share the link to share the build.Source
One cart across 9 vendors · prices in USD as listedChestnut Robotics (formerly TetherIA) sells a kit. Buying from the maker funds the people who opened the design. No BOM line below lists them as a vendor yet, so check their store before ordering parts one by one.
24 lines · 156 parts · 4 without an offer in US · 2/24 lines sourced in 2+ regions (L3 gate)
| # | Part | Category | Qty | Unit | Line | Offer |
|---|---|---|---|---|---|---|
The Spring Store2 lines · $31.28 | ||||||
| 1 | Finger distal/medial and thumb proximal/distal return spring (PIP), music wire structure.spring-pip · MPN PE020-140-33500-MW-0840-MH-N-IN | structure | 5 | $5.27 | $26.35 | The Spring Store |
| 2 | Thumb CMC/MCP return spring, music wire structure.spring-cmc · MPN PE023-172-11218-MW-0470-MH-N-IN | structure | 1 | $4.93 | $4.93 | The Spring Store |
McMaster-Carr8 lines · $25.39 | ||||||
| 3 | Dowel pin 1 x 10 mm fastener.pin-1x10 · MPN 91585A091 | fastener | 16 | $0.16 | $2.53 | McMaster-Carr |
| 4 | Dowel pin 2 x 14 mm fastener.pin-2x14 · MPN 91585A226 | fastener | 12 | $0.19 | $2.33 | McMaster-Carr |
| 5 | Dowel pin 2 x 20 mm fastener.pin-2x20 · MPN 91585A240 | fastener | 2 | $1.00 | $2.00 | McMaster-Carr |
| 6 | Undersized dowel pin 2 x 10 mm (slip fit in bearings) fastener.pin-2x10-undersized · MPN 97049A104 | fastener | 19 | $0.16 | $2.96 | McMaster-Carr |
| 7 | M2 x 6 flanged Torx self-tapping screw fastener.m2x6-flanged-torx · MPN 96817A406 | fastener | 25 | $0.40 | $10.08 | McMaster-Carr |
| 8 | M2 x 10 countersunk Torx self-tapping screw fastener.m2x10-cs-torx · MPN 95893A167 | fastener | 12 | $0.30 | $3.60 | McMaster-Carr |
| 9 | M3 x 10 rounded Torx self-tapping screw fastener.m3x10-torx · MPN 96817A322 | fastener | 9 | $0.12 | $1.06 | McMaster-Carr |
| 10 | M3 x 5.7 brass heat-set insert fastener.insert-m3 · MPN 94459A140 | fastener | 4 | $0.21 | $0.84 | McMaster-Carr |
Amazon3 lines · $18.29 + 1 unpriced | ||||||
| 11 | Braided Vectran (or Kevlar) cord, spool: 11 tendons of 300 mm (4 finger pull incl. pinky, 4 finger coupling, thumb CMC flex, thumb pull, thumb coupling) cable.vectran | cable | 1 | $6.29 | $6.29 | AmazonDWLIFE Kevlar cord, the BOM's primary link |
| 12 | 2x5x2.5 mm miniature bearing (MR52ZZ) structure.bearing-mr52zz · MPN MR52ZZ | structure | 23 | $0.52 | $12.00 | AmazonYodaoke 25-pack; BOM suggests MISUMI bearings if pins don't fit |
| 13 | Smooth-On Ecoflex 00-30 platinum silicone (finger, thumb and palm pads; ~40 g per hand) other.silicone-00-30 · 1 alt | other | 1 | unpriced | — | AmazonBOM costs the pads by volume (~$0.37 per hand), not per kit |
SparkFun1 line · $13.50 | ||||||
| 14 | SparkFun snappable protoboard (optional control board / busbar) electronics.protoboard | electronics | 1 | $13.50 | $13.50 | SparkFun |
Century Spring1 line · $13.08 | ||||||
| 15 | Finger proximal/MCP return spring (MP), music wire structure.spring-mp · MPN M-35CS | structure | 4 | $3.27 | $13.08 | Century Spring |
Seeed Studio1 line · $7.99 | ||||||
| 16 | Seeed Studio XIAO ESP32S3 (hand controller) electronics.xiao-esp32s3 · MPN XIAO ESP32S3 | compute | 1 | $7.99 | $7.99 | Seeed Studioships globally |
MISUMI2 lines · $2.86 | ||||||
| 17 | Undersized dowel pin 2 x 20 mm fastener.pin-2x20-undersized | fastener | 1 | $1.52 | $1.52 | MISUMIUndersized dowel pin series cited in the BOM (select size); search parameters stripped |
| 18 | Undersized dowel pin 2 x 30 mm (thumb CMC) fastener.pin-2x30-undersized | fastener | 1 | $1.34 | $1.34 | MISUMIUndersized dowel pin series cited in the BOM (select size); search parameters stripped |
DigiKey1 line · $1.47 | ||||||
| 19 | Molex 3-pin connector (optional soldered servo busbar) electronics.molex-3pin · MPN 0022035035 | electronics | 7 | $0.21 | $1.47 | DigiKey |
Bambu Lab1 line · unpriced | ||||||
| 20 | PLA filament (BOM costs printed parts by volume, about $5 per hand) printed.pla | printed | 1 | unpriced | — | Bambu Labships globallyNamed in the BOM, no product link |
No offer in this region4 lines · $210.39 + 2 unpriced | ||||||
| 21 | Feetech HLS3606M 6 V smart servo (with mount plate, M2.3x5 spline screw, M2x4 plate screws and connection cable) actuator.hls3606m · MPN HLS3606M | actuator | 7 | $29.83list price | $208.81 | Offers in CN only |
| 22 | Feetech TTLinker mini UART signal conversion board electronics.ttlinker · 1 alt | electronics | 1 | $1.58list price | $1.58 | Offers in CN only |
| 23 | 6 V DC power supply for the servo rail (firmware README: up to 10 A peak), terminal replaced by an XT30 power.psu-6v | power | 1 | unpriced | — | No offer found yet |
| 24 | XT30 connector and heat shrink (power lead) cable.xt30 | cable | 1 | unpriced | — | No offer found yet |
| Cart total · US | 156 | $324.25 | 4 lines unpriced, not in total | |||
Fabricate
Planned for a 256 mm bed- Fabricated parts
- 38
- Print time (sum)
- —
- Material (sum)
- —
- Plates · estimate
- —
No plate estimate: the package does not list grams per part yet, and we will not guess them. Slice the source files for your 256 mm bed.
| Part | Process | Material | Qty | h / part | g / part | Profile |
|---|---|---|---|---|---|---|
Finger Base (P/N 1) printed.finger-base | FDM | PLA | 4 | — | — | Bambu X1C, 0.4 mm nozzle, 0.2 mm layers, tree supports on build plate only; keep the orientation of the one-click print files |
Finger MCP (P/N 2) printed.finger-mcp | FDM | PLA | 4 | — | — | Bambu X1C, 0.4 mm nozzle, 0.2 mm layers, tree supports on build plate only; keep the orientation of the one-click print files |
Finger Proximal (P/N 3) printed.finger-proximal | FDM | PLA | 4 | — | — | Bambu X1C, 0.4 mm nozzle, 0.2 mm layers, tree supports on build plate only; keep the orientation of the one-click print files |
Finger Medial (P/N 4) printed.finger-medial | FDM | PLA | 4 | — | — | Bambu X1C, 0.4 mm nozzle, 0.2 mm layers, tree supports on build plate only; keep the orientation of the one-click print files |
Finger Distal (P/N 5) printed.finger-distal | FDM | PLA | 4 | — | — | Bambu X1C, 0.4 mm nozzle, 0.2 mm layers, tree supports on build plate only; keep the orientation of the one-click print files |
Cable Spool (P/N 6) printed.cable-spool | FDM | PLA | 6 | — | — | Bambu X1C, 0.4 mm nozzle, 0.2 mm layers, tree supports on build plate only; keep the orientation of the one-click print files |
Thumb Abduction Upper Servo Disk (P/N 7) printed.thumb-abd-upper-disk | FDM | PLA | 1 | — | — | Bambu X1C, 0.4 mm nozzle, 0.2 mm layers, tree supports on build plate only; keep the orientation of the one-click print files |
Thumb Abduction Lower Servo Disk (P/N 8) printed.thumb-abd-lower-disk | FDM | PLA | 1 | — | — | Bambu X1C, 0.4 mm nozzle, 0.2 mm layers, tree supports on build plate only; keep the orientation of the one-click print files |
Thumb Abduction Linkage Bar (P/N 9) printed.thumb-linkage-bar | FDM | PLA | 1 | — | — | Bambu X1C, 0.4 mm nozzle, 0.2 mm layers, tree supports on build plate only; keep the orientation of the one-click print files |
Thumb CMC Base (P/N 10) printed.thumb-cmc-base | FDM | PLA | 1 | — | — | Bambu X1C, 0.4 mm nozzle, 0.2 mm layers, tree supports on build plate only; keep the orientation of the one-click print files |
Thumb MCP (P/N 11) printed.thumb-mcp | FDM | PLA | 1 | — | — | Bambu X1C, 0.4 mm nozzle, 0.2 mm layers, tree supports on build plate only; keep the orientation of the one-click print files |
Thumb Proximal (P/N 12) printed.thumb-proximal | FDM | PLA | 1 | — | — | Bambu X1C, 0.4 mm nozzle, 0.2 mm layers, tree supports on build plate only; keep the orientation of the one-click print files |
Thumb Distal (P/N 13) printed.thumb-distal | FDM | PLA | 1 | — | — | Bambu X1C, 0.4 mm nozzle, 0.2 mm layers, tree supports on build plate only; keep the orientation of the one-click print files |
Servo Frame (P/N 14) printed.servo-frame | FDM | PLA | 1 | — | — | Bambu X1C, 0.4 mm nozzle, 0.2 mm layers, tree supports on build plate only; keep the orientation of the one-click print files |
Palm Front Frame (P/N 15) printed.palm-front | FDM | PLA | 1 | — | — | Bambu X1C, 0.4 mm nozzle, 0.2 mm layers, tree supports on build plate only; keep the orientation of the one-click print files |
Palm Rear Frame (P/N 16) printed.palm-rear | FDM | PLA | 1 | — | — | Bambu X1C, 0.4 mm nozzle, 0.2 mm layers, tree supports on build plate only; keep the orientation of the one-click print files |
Silicone pad molds, top and bottom halves (One_Click_Print_Molds_R+L.3mf) printed.molds | FDM | PLA | 2 | — | — | Bambu X1C, 0.4 mm nozzle, 0.2 mm layers, tree supports on build plate only; keep the orientation of the one-click print files |
Assemble
Every step ends in a check- Steps
- 23
- Subassemblies
- 10
- Hands-on time (sum)
- —
- Critical path
- —
- Your progress · this device
- —
23 steps have no time estimate; times above are lower bounds.
Steps, in build order
- Fabrication01
Print the hand from the one-click files
Open `One_Click_Print_R.3mf` (or `_L`) and print in PLA with a 0.4 mm nozzle, 0.2 mm layers and tree supports on the build plate only. Keep the supplied orientation: it sets the surface finish of the interfacing faces. Tolerances were tuned on a Bambu X1C.
CHECKAll 16 part numbers are printed in the BOM quantities (4 of each finger part, 6 cable spools, one of each thumb and palm part).- Parts in
- PLA filament (BOM costs printed parts by volume, about $5 per hand)printed.pla
- Finger Base (P/N 1)printed.finger-base
- Finger MCP (P/N 2)printed.finger-mcp
- Finger Proximal (P/N 3)printed.finger-proximal
- Finger Medial (P/N 4)printed.finger-medial
- Finger Distal (P/N 5)printed.finger-distal
- Cable Spool (P/N 6)printed.cable-spool
- Thumb Abduction Upper Servo Disk (P/N 7)printed.thumb-abd-upper-disk
- Thumb Abduction Lower Servo Disk (P/N 8)printed.thumb-abd-lower-disk
- Thumb Abduction Linkage Bar (P/N 9)printed.thumb-linkage-bar
- Thumb CMC Base (P/N 10)printed.thumb-cmc-base
- Thumb MCP (P/N 11)printed.thumb-mcp
- Thumb Proximal (P/N 12)printed.thumb-proximal
- Thumb Distal (P/N 13)printed.thumb-distal
- Servo Frame (P/N 14)printed.servo-frame
- Palm Front Frame (P/N 15)printed.palm-front
- Palm Rear Frame (P/N 16)printed.palm-rear
- Tools
- FDM printer, bed >= 200 x 200 mm
- Torque
- —
- Time
- —
- After
- Start
- Source
- github.com
- 02
Cut 11 tendons with stopper knots
Tie an Ashley stopper knot at the spool end, cut the cord 300 mm from the knot, repeat to make 11 cables, and trim each knot tail to under 5 mm.
CHECK11 cables, each 300 mm from knot to end, with tails under 5 mm.- Parts in
- Braided Vectran (or Kevlar) cord, spool: 11 tendons of 300 mm (4 finger pull incl. pinky, 4 finger coupling, thumb CMC flex, thumb pull, thumb coupling)cable.vectran
- Tools
- Scissors / razor blade, Tape measure
- Torque
- —
- Time
- —
- After
- Start
- Source
- github.com
- Electronics03
Fit an XT30 to the 6 V supply
Safety · human-verified requiredUnplug the supply from mains. Cut off its output terminal, strip, and solder the leads to an XT30 (the flat side is positive), then cover the joints with heat shrink.
CHECKWith the supply plugged in, the XT30 reads about +6 V on the flat-side pin relative to the other, and nothing is exposed.This step can hurt a person or ruin parts. Its instructions need sign-off by a human who has done it before relying on them. Stop and ask if anything differs from what you see.
- Parts in
- 6 V DC power supply for the servo rail (firmware README: up to 10 A peak), terminal replaced by an XT30power.psu-6v
- XT30 connector and heat shrink (power lead)cable.xt30
- Tools
- Soldering iron, Heat shrink, Multimeter
- Torque
- —
- Time
- —
- After
- Start
- Source
- github.com
- Fabrication04
Remove supports and deburr
Cut supports with flush cutters and file or sand every printed part. The guide marks surfaces with arrows that need extra attention for the parts to function.
CHECKNo support remnants on any joint face, and mating parts slide together by hand.- Parts in
- Finger Base (P/N 1)printed.finger-base
- Finger Proximal (P/N 3)printed.finger-proximal
- Palm Rear Frame (P/N 16)printed.palm-rear
- Tools
- Flush cutters, Files / sandpaper
- Torque
- —
- Time
- —
- After
- 01
- Source
- github.com
- Electronics05
Build the control board (skip with the Aero PCB)
Safety · human-verified requiredWire the XIAO ESP32S3 to the TTLinker per the electrical schematic on a breadboard, protoboard or the published PCB (green RX, yellow TX, black ground). For the optional busbar, cut a 7x8 protoboard, place the Molex connectors as shown, solder with 22 AWG, clean off flux and cover the wiring. Or daisy-chain the servos with the 3-way connectors supplied with them.
CHECKContinuity: ESP32 TX goes to TTLinker RX and vice versa, grounds are common, and there is no short between 6 V and ground.This step can hurt a person or ruin parts. Its instructions need sign-off by a human who has done it before relying on them. Stop and ask if anything differs from what you see.
- Parts in
- Seeed Studio XIAO ESP32S3 (hand controller)electronics.xiao-esp32s3
- Feetech TTLinker mini UART signal conversion boardelectronics.ttlinker
- SparkFun snappable protoboard (optional control board / busbar)electronics.protoboard
- Molex 3-pin connector (optional soldered servo busbar)electronics.molex-3pin
- Tools
- Soldering iron, 22 AWG solid wire, Hot glue or liquid electrical tape
- Torque
- —
- Time
- —
- After
- 03
- Source
- github.com
- Fabrication06
Drill the joint holes (1.0 / 2.0 / 2.1 mm)
Drill the finger and thumb joint holes to the sizes marked in the guide (1.0 mm spring pins, 2.0 mm press pins, 2.1 mm running pins). All finger holes are through holes; two thumb holes are marked 'not through'.
CHECKEach 2.1 mm hole lets a 2 mm pin rotate freely, each 2.0 mm hole grips its pin, and the two blind thumb holes are not drilled through.- Parts in
- Finger Base (P/N 1)printed.finger-base
- Finger MCP (P/N 2)printed.finger-mcp
- Finger Proximal (P/N 3)printed.finger-proximal
- Finger Medial (P/N 4)printed.finger-medial
- Finger Distal (P/N 5)printed.finger-distal
- Thumb CMC Base (P/N 10)printed.thumb-cmc-base
- Thumb MCP (P/N 11)printed.thumb-mcp
- Thumb Proximal (P/N 12)printed.thumb-proximal
- Thumb Distal (P/N 13)printed.thumb-distal
- Tools
- Jewelry hand drill, 1.0 mm, 2.0 mm and 2.1 mm drill bits
- Torque
- —
- Time
- —
- After
- 04
- Source
- github.com
- Firmware07
Install the SDK and flash the ESP32 firmware
`pip install aero-open-sdk`, then run `aero-open-gui`, pick the serial port and click Upload Firmware. Select the newest binary for your side from firmware/main/bin (e.g. `firmware_v0.2.0_righthand.bin`). Building from source instead: set LEFT_HAND or RIGHT_HAND in `HandConfig.h` and upload `firmware.ino` for board XIAO_ESP32S3 from Arduino IDE or PlatformIO. On Linux add yourself to the `dialout` group.
CHECKThe GUI reports a successful upload and the port re-enumerates as the Espressif USB JTAG/serial device.- Parts in
- Seeed Studio XIAO ESP32S3 (hand controller)electronics.xiao-esp32s3
- Tools
- Python 3.10+, USB-C cable
- Torque
- —
- Time
- —
- After
- 05
- Source
- github.com
- Palm08
Set the M3 heat-set inserts
Safety · human-verified requiredWith the insert tip hot, press each of the four M3 inserts gently into the palm until flush. The iron and inserts stay hot for minutes.
CHECKFour inserts flush and square; an M3 screw threads in without the insert turning.This step can hurt a person or ruin parts. Its instructions need sign-off by a human who has done it before relying on them. Stop and ask if anything differs from what you see.
- Parts in
- M3 x 5.7 brass heat-set insertfastener.insert-m3
- Palm Rear Frame (P/N 16)printed.palm-rear
- Tools
- Soldering iron with heat-insert tip
- Torque
- —
- Time
- —
- After
- 04
- Source
- github.com
- Fingers09
Finger bearings, springs and pins (x4)
Press four MR52ZZ bearings into the finger proximal and finger base and secure them with undersized 2x10 pins. Route an unmarked coupling cable through the hole at the end of the proximal and pull it tight to seat the knot. Fit the PIP spring between proximal and medial with two 1x10 pins, the MP spring on the proximal base with one 1x10 pin, and join proximal and medial with a 2x14 pin.
CHECKEvery bearing spins freely (deburr if not), and the medial springs back to straight when released.- Parts in
- 2x5x2.5 mm miniature bearing (MR52ZZ)structure.bearing-mr52zz
- Undersized dowel pin 2 x 10 mm (slip fit in bearings)fastener.pin-2x10-undersized
- Dowel pin 1 x 10 mmfastener.pin-1x10
- Dowel pin 2 x 14 mmfastener.pin-2x14
- Finger distal/medial and thumb proximal/distal return spring (PIP), music wirestructure.spring-pip
- Finger proximal/MCP return spring (MP), music wirestructure.spring-mp
- Tools
- Needle-nose pliers
- Torque
- —
- Time
- —
- After
- 06
- Source
- github.com
- Thumb10
Thumb bearings, springs, pins and coupling cable
Insert bearings into the thumb base and MCP with undersized 2x10 pins. Fit the PIP spring between proximal and MCP with 1x10 pins and join distal, proximal and MCP with 2x20 pins. Connect MCP to CMC with the CMC spring and two 1x10 pins, with a bearing between them, secured by a 2x20 pin. Thread the thumb coupling cable through the MCP, the lower proximal hole and over the distal, loop it on the crossmember (note loop direction) and pinch it with an M2x6 screw like the fingers.
CHECKThe thumb flexes with coupled distal motion and springs back open; the CMC joint rotates on its bearing without wobble.- Parts in
- Thumb CMC Base (P/N 10)printed.thumb-cmc-base
- Thumb MCP (P/N 11)printed.thumb-mcp
- Thumb Proximal (P/N 12)printed.thumb-proximal
- Thumb Distal (P/N 13)printed.thumb-distal
- 2x5x2.5 mm miniature bearing (MR52ZZ)structure.bearing-mr52zz
- Undersized dowel pin 2 x 10 mm (slip fit in bearings)fastener.pin-2x10-undersized
- Dowel pin 1 x 10 mmfastener.pin-1x10
- Dowel pin 2 x 20 mmfastener.pin-2x20
- Finger distal/medial and thumb proximal/distal return spring (PIP), music wirestructure.spring-pip
- Thumb CMC/MCP return spring, music wirestructure.spring-cmc
- Braided Vectran (or Kevlar) cord, spool: 11 tendons of 300 mm (4 finger pull incl. pinky, 4 finger coupling, thumb CMC flex, thumb pull, thumb coupling)cable.vectran
- M2 x 6 flanged Torx self-tapping screwfastener.m2x6-flanged-torx
- Tools
- Needle-nose pliers, Torx driver, Floss threader
- Torque
- —
- Time
- —
- Source
- github.com
- 11
Thumb abduction linkage
Sandwich a servo aluminium mount plate between the lower and upper thumb servo disks with M2x4 screws and threadlocker. Drill the disk linkage holes 2.0 mm and the linkage bar hole 2.1 mm, then pin the bar between the disks with a 2x10 pin. The linkage direction matters: match the guide image.
CHECKThe linkage bar pivots freely in the disks and points in the direction shown in the guide.- Parts in
- Thumb Abduction Upper Servo Disk (P/N 7)printed.thumb-abd-upper-disk
- Thumb Abduction Lower Servo Disk (P/N 8)printed.thumb-abd-lower-disk
- Thumb Abduction Linkage Bar (P/N 9)printed.thumb-linkage-bar
- Feetech HLS3606M 6 V smart servo (with mount plate, M2.3x5 spline screw, M2x4 plate screws and connection cable)actuator.hls3606m
- Undersized dowel pin 2 x 10 mm (slip fit in bearings)fastener.pin-2x10-undersized
- Tools
- 2.0 and 2.1 mm drill bits, Phillips driver, Blue threadlocker
- Torque
- —
- Time
- —
- After
- 06
- Source
- github.com
- Firmware12
Label servos and set IDs 0-6
Safety · human-verified requiredMark the seven servos 0 to 6. Power the control board from 6 V and the ESP32 over USB, then connect one servo at a time and set its ID in the GUI (docs: GUI, 'Setting servo IDs'). Channel map: 0 thumb CMC abduction, 1 thumb CMC flexion, 2 thumb tendon, 3 index, 4 middle, 5 ring, 6 pinky.
CHECKAfter a reset with all servos chained, the serial monitor shows OK from all 7 servos.This step can hurt a person or ruin parts. Its instructions need sign-off by a human who has done it before relying on them. Stop and ask if anything differs from what you see.
- Parts in
- Feetech HLS3606M 6 V smart servo (with mount plate, M2.3x5 spline screw, M2x4 plate screws and connection cable)actuator.hls3606m
- 6 V DC power supply for the servo rail (firmware README: up to 10 A peak), terminal replaced by an XT30power.psu-6v
- Tools
- Paint marker
- Torque
- —
- Time
- —
- After
- 07
- Source
- docs.tetheria.ai
- Fingers13
Tension the finger coupling cable (x4)
Thread the coupling cable through the bottom hole of the medial, under the distal bar, and wrap it once round the bar. Start an M2x6 Torx screw in the distal, join distal and medial with a 2x14 pin, pull the cable taut, flex the finger while holding tension, then tighten the screw to pinch the cable. Repeat for all four fingers.
CHECKWhen you flex and open the finger, the distal/medial angle tracks the medial/proximal angle (coupled motion, as in the upstream video).- Parts in
- Braided Vectran (or Kevlar) cord, spool: 11 tendons of 300 mm (4 finger pull incl. pinky, 4 finger coupling, thumb CMC flex, thumb pull, thumb coupling)cable.vectran
- M2 x 6 flanged Torx self-tapping screwfastener.m2x6-flanged-torx
- Dowel pin 2 x 14 mmfastener.pin-2x14
- Tools
- Torx driver, Floss threader
- Torque
- —
- Time
- —
- Source
- github.com
- Actuators14
Mount spools and mark tendon lengths
Screw a cable spool to each aluminium servo mount with three screws and threadlocker, fix the mount to servos 1-6 with the large spline screw and threadlocker, thread a cable into each spool and mark it at the length for that servo from the guide's cable table (e.g. servo 1: 90 mm; finger pull servos 3, 4, 5: 140 mm from the spool exit).
CHECKSix spools are fixed without wobble and each cable carries a mark at its table length.- Parts in
- Cable Spool (P/N 6)printed.cable-spool
- Feetech HLS3606M 6 V smart servo (with mount plate, M2.3x5 spline screw, M2x4 plate screws and connection cable)actuator.hls3606m
- Braided Vectran (or Kevlar) cord, spool: 11 tendons of 300 mm (4 finger pull incl. pinky, 4 finger coupling, thumb CMC flex, thumb pull, thumb coupling)cable.vectran
- M2 x 6 flanged Torx self-tapping screwfastener.m2x6-flanged-torx
- Tools
- Phillips driver, Blue threadlocker, Tape measure, Marker
- Torque
- —
- Time
- —
- After
- 12
- Source
- github.com
- 15
Thread finger pull cables
Fit servo base and MCP to each finger proximal with a 2x14 pin. Thread the servo 6 cable through a finger base, between the bearings, through the top medial hole and the distal, and tie an Ashley stopper knot at the mark. Repeat for servos 3, 4 and 5.
CHECKPulling each servo cable by hand closes its finger fully, and the finger springs back open when released.- Parts in
- Braided Vectran (or Kevlar) cord, spool: 11 tendons of 300 mm (4 finger pull incl. pinky, 4 finger coupling, thumb CMC flex, thumb pull, thumb coupling)cable.vectran
- Dowel pin 2 x 14 mmfastener.pin-2x14
- Finger MCP (P/N 2)printed.finger-mcp
- Tools
- Floss threader, Tweezers
- Torque
- —
- Time
- —
- Source
- github.com
- Palm16
Assemble the thumb servo frame
Fix servo 1 (two M2x6), servo 0 (four M2x6) and servo 2 (two M2x6) to the servo frame. Attach the linkage to servo 0 with the screw supplied with the servo and threadlocker, then pin the linkage to the thumb CMC base with a 2x10 pin.
CHECKCommanding nothing, the thumb swings through abduction by hand via the linkage without binding.- Parts in
- Servo Frame (P/N 14)printed.servo-frame
- Feetech HLS3606M 6 V smart servo (with mount plate, M2.3x5 spline screw, M2x4 plate screws and connection cable)actuator.hls3606m
- M2 x 6 flanged Torx self-tapping screwfastener.m2x6-flanged-torx
- Undersized dowel pin 2 x 10 mm (slip fit in bearings)fastener.pin-2x10-undersized
- Tools
- Torx driver, Blue threadlocker
- Torque
- —
- Time
- —
- Source
- github.com
- 17
Install finger servos, frame and control board in the palm
Place servos 3-6 in the rear palm with numbers visible (left hand: mirror the sides). Add the frame with servos 0-2, feeding servo 1 and 2 wires under the others. Fix the MCP blocks with M2x10 countersunk screws, plug every servo into the board, push the board into the palm aligning its notch and fix it with M2x10. Push the frame flush without crushing any wire and secure it with M3x10 screws.
CHECKThe frame sits flush on the palm with no pinched wire, and a GUI scan still finds IDs 0-6.- Parts in
- Palm Rear Frame (P/N 16)printed.palm-rear
- M2 x 10 countersunk Torx self-tapping screwfastener.m2x10-cs-torx
- M3 x 10 rounded Torx self-tapping screwfastener.m3x10-torx
- Feetech TTLinker mini UART signal conversion boardelectronics.ttlinker
- Tools
- Torx driver, Flexible driver extension
- Torque
- —
- Time
- —
- Source
- github.com
- 18
Mount fingers and MCP springs
Secure the fingers with M2x10 countersunk screws, then fix the MCP springs to the rear palm with M2x6 Torx screws. Do not fully tighten these: it permanently deforms the springs.
CHECKEach finger returns to its open rest pose from any MCP angle.- Parts in
- M2 x 10 countersunk Torx self-tapping screwfastener.m2x10-cs-torx
- M2 x 6 flanged Torx self-tapping screwfastener.m2x6-flanged-torx
- Finger proximal/MCP return spring (MP), music wirestructure.spring-mp
- Tools
- Torx driver
- Torque
- —
- Time
- —
- After
- 17
- Source
- github.com
- 19
Thumb CMC flex and pull cables, CMC pin
Thread the servo 1 cable through the hole nearer the back of the palm on the thumb MCP and knot it at its mark. Thread the servo 2 cable through the MCP around the bearing and the top hole of the thumb proximal and knot it at its mark. Push the bearings into the CMC base and insert the undersized 2x30 pin from below until flush, pressing on the bearings so they stay in.
CHECKBoth thumb cables are taut at rest and the 2x30 pin is flush with the top surface.- Parts in
- Braided Vectran (or Kevlar) cord, spool: 11 tendons of 300 mm (4 finger pull incl. pinky, 4 finger coupling, thumb CMC flex, thumb pull, thumb coupling)cable.vectran
- 2x5x2.5 mm miniature bearing (MR52ZZ)structure.bearing-mr52zz
- Undersized dowel pin 2 x 30 mm (thumb CMC)fastener.pin-2x30-undersized
- Undersized dowel pin 2 x 20 mmfastener.pin-2x20-undersized
- Tools
- Floss threader
- Torque
- —
- Time
- —
- After
- 18
- Source
- github.com
- 20
Close the palm
Fix servos 3-6 to the frame with M2x6 screws, add the front palm and secure it with four M3x10 screws from the back of the hand. Trim all cable tails to 5 mm from the knot.
CHECKThe palm is closed with no gap at the seams and no tail longer than 5 mm.- Parts in
- Palm Front Frame (P/N 15)printed.palm-front
- M3 x 10 rounded Torx self-tapping screwfastener.m3x10-torx
- M2 x 6 flanged Torx self-tapping screwfastener.m2x6-flanged-torx
- Tools
- Torx driver, Scissors
- Torque
- —
- Time
- —
- After
- 19
- Source
- github.com
- Bring-up21
First power-up: homing
Safety · human-verified requiredPower the servo rail from the 6 V supply (separate from USB), open `aero-open-gui` and run Homing. Each channel drives slowly to its mechanical stop by current sensing, backs off and moves to the extend pose; allow up to ~25 s per channel and keep hands clear. Use Trim Servo to align any finger's open endpoint (saved in NVS), and Calibrate Mid at low speed and torque if a tendon's travel falls outside the default window.
CHECKHoming ACKs for all 7 channels and the hand ends fully open; commanding a fist with low speed closes every finger without a servo reporting over 80 °C.This step can hurt a person or ruin parts. Its instructions need sign-off by a human who has done it before relying on them. Stop and ask if anything differs from what you see.
- Parts in
- 6 V DC power supply for the servo rail (firmware README: up to 10 A peak), terminal replaced by an XT30power.psu-6v
- Tools
- —
- Torque
- —
- Time
- —
- After
- 20
- Source
- github.com
- Finishing22
Optional: cast and bond silicone pads
Place the molds on a flat tray, mix about 40 g of Ecoflex 00-30, fill the negatives ~80%, wait 5 min, then close the distal and proximal molds until silicone squeezes out. Cure upright for 3 h, demold and trim flash. Bond pads to the distal, proximal and palm with a thin, even layer of silicone adhesive, pressing 30 s each. For more than 10,000 cycles per joint, superglue every pin at both ends.
CHECKAll pads are bonded edge to edge with no lifting when you rub them sideways.- Parts in
- Silicone pad molds, top and bottom halves (One_Click_Print_Molds_R+L.3mf)printed.molds
- Smooth-On Ecoflex 00-30 platinum silicone (finger, thumb and palm pads; ~40 g per hand)other.silicone-00-30
- Tools
- Silicone adhesive, Scale
- Torque
- —
- Time
- —
- After
- 20
- Source
- github.com
- Policy23
Optional: deploy the Z-rotation RL policy
Flash `firmware/main/bin/rl_z_rotation/firmware_v0.1.0_righthand.bin` (or lefthand) from the GUI, then close the GUI. Print the 60 mm cube (target 117 g) and the mount from `ros2/src/aero_hand_open_rl/resource/`. In `ros2/`: `colcon build --packages-select aero_hand_open aero_hand_open_rl`, then run `ros2 run aero_hand_open aero_hand_node` and, in a second terminal, `ros2 run aero_hand_open_rl rl_z_rotation_deploy`.
CHECKWith the hand fixed in the mount and the cube placed on the palm, the hand rotates the cube about the vertical axis.- Parts in
- —
- Tools
- ROS 2 Humble, colcon
- Torque
- —
- Time
- —
- After
- 21
- Source
- github.com
Progress is stored in this browser only (localStorage). Nothing is sent anywhere.
Bring-up
Flash · calibrate · first policy- A
Flash firmware
TargetsSeeed XIAO ESP32S3 (hand controller, 16-byte binary serial protocol, default 921600 baud), Feetech HLS3606M bus servos, IDs 0-6
Repogithub.com/Chestnut-Robotics/aero-hand-open/tree/main/firmware
Prebuilt left/right binaries in firmware/main/bin (v0.1.0 to v0.2.0); flash from `aero-open-gui` or build firmware.ino with LEFT_HAND/RIGHT_HAND set in HandConfig.h. Servo rail is 6 V from its own supply (up to 10 A), separate from USB. Servos over 80 °C may ignore commands until they cool. Torque control closes only (open-to-close direction).
- B
Calibrate
CalibrationCurrent-based homing on the ESP32 (GUI Homing button or opcode 0x01), then TRIM (0x03) per channel to set the extend endpoint, stored in NVS. CALIBRATE_MID re-centres a channel whose tendon travel falls outside the default single-turn window.Log the output. It goes in your build report.
- C
First policy
- in-hand cube rotation about Z (60 mm, 117 g cube)MuJoCo Playground PPO, deployed via ROS 2 (rl_z_rotation_deploy) source
Try the policy in the browser sim before it touches hardware. Keep a hand near the power switch the first time a policy runs on the real robot.
Report your build
Moves Aero Hand Open toward L4 · BuiltA build report is the only thing that proves a package works. It raises the level, puts a point on the map, and tells the Foreman which steps to rewrite.
Level gate
Holds L2 · evidence, not confidence- L0Indexed
Known to exist. Atlas page only.
- 3 sources on record(met)
- L1Compiled
Package validates against the spec; every fact has a source.
- Build package compiled(met)
- 15 sources across robot and package(met)
- L2Sim-verified
Loads in browser and GPU sim, mass within tolerance of the BOM, holds a stand. Unlocks .training.
- URDF/MJCF is public(met)
- Sim load, mass tolerance and stand are checked on .training(checked elsewhere)
- L3Sourced
Every BOM line resolves to a live offer in at least two regions. Unlocks the one-click cart.
- 0/24 BOM lines have offers in 2+ regions(not met)
- L4Built
At least one community build report with photos and bring-up logs. Unlocks Build it as the main action.
- 0 reviewed build reports(not met)
- Review feed unreachable at last refresh; count is registry-only(checked elsewhere)
- L5Certified
The robot's maintainer signs the package. Unlocks certified teams and kit sales.
- Maintainer signature not recorded(not met)
Levels are cumulative and set by the registry from reviewed evidence. This panel shows what can be measured from the package today.
Same robot, other verbs
Revisions and sources
Every fact on this sheet traces to one of these| Rev | Description | Checked |
|---|---|---|
| PKG | Build package, current revision 0.1.0 | — |
| S1 | Aero Hand Open repo (specs, license TL;DR)github.com | 2026-09-24 |
| S2 | Rebrand announcementx.com | 2026-09-24 |
| S3 | arXiv paperarxiv.org | 2026-09-24 |
| S4 | aero-hand-open READMEgithub.com | 2026-09-25 |
| S5 | hardware/Assembly/BOM.csvgithub.com | 2026-09-25 |
| S6 | hardware/Assembly/Tools.csvgithub.com | 2026-09-25 |
| S7 | Gen1 Open Assembly Guide (PDF)github.com | 2026-09-25 |
| S8 | hardware/CAD (STEP, one-click 3MF, molds)github.com | 2026-09-25 |
| S9 | hardware/PCB (KiCad, Gerber)github.com | 2026-09-25 |
| S10 | Firmware READMEgithub.com | 2026-09-25 |
| S11 | aero-open-sdkgithub.com | 2026-09-25 |
| S12 | aero_hand_open_rl (Z-rotation deployment)github.com | 2026-09-25 |
| S13 | docs.tetheria.ai assemblydocs.tetheria.ai | 2026-09-25 |
| S14 | docs.tetheria.ai GUI (servo IDs)docs.tetheria.ai | 2026-09-25 |
| S15 | Aero Hand Open paper (arXiv:2608.28578)arxiv.org | 2026-09-25 |