Build package
Build Asimov 1
Menlo Research (Asimov) · Humanoid · active · 2026
1.2 m, 35 kg open-source biped with 25 actuated DOF, sold as an unassembled DIY kit or self-sourced from the published BOM and CAD.
Build is partial: CAD (98 STEP files) and assembly docs are public; the full BOM is only sent on request, so the build package is reconstructed from docs.
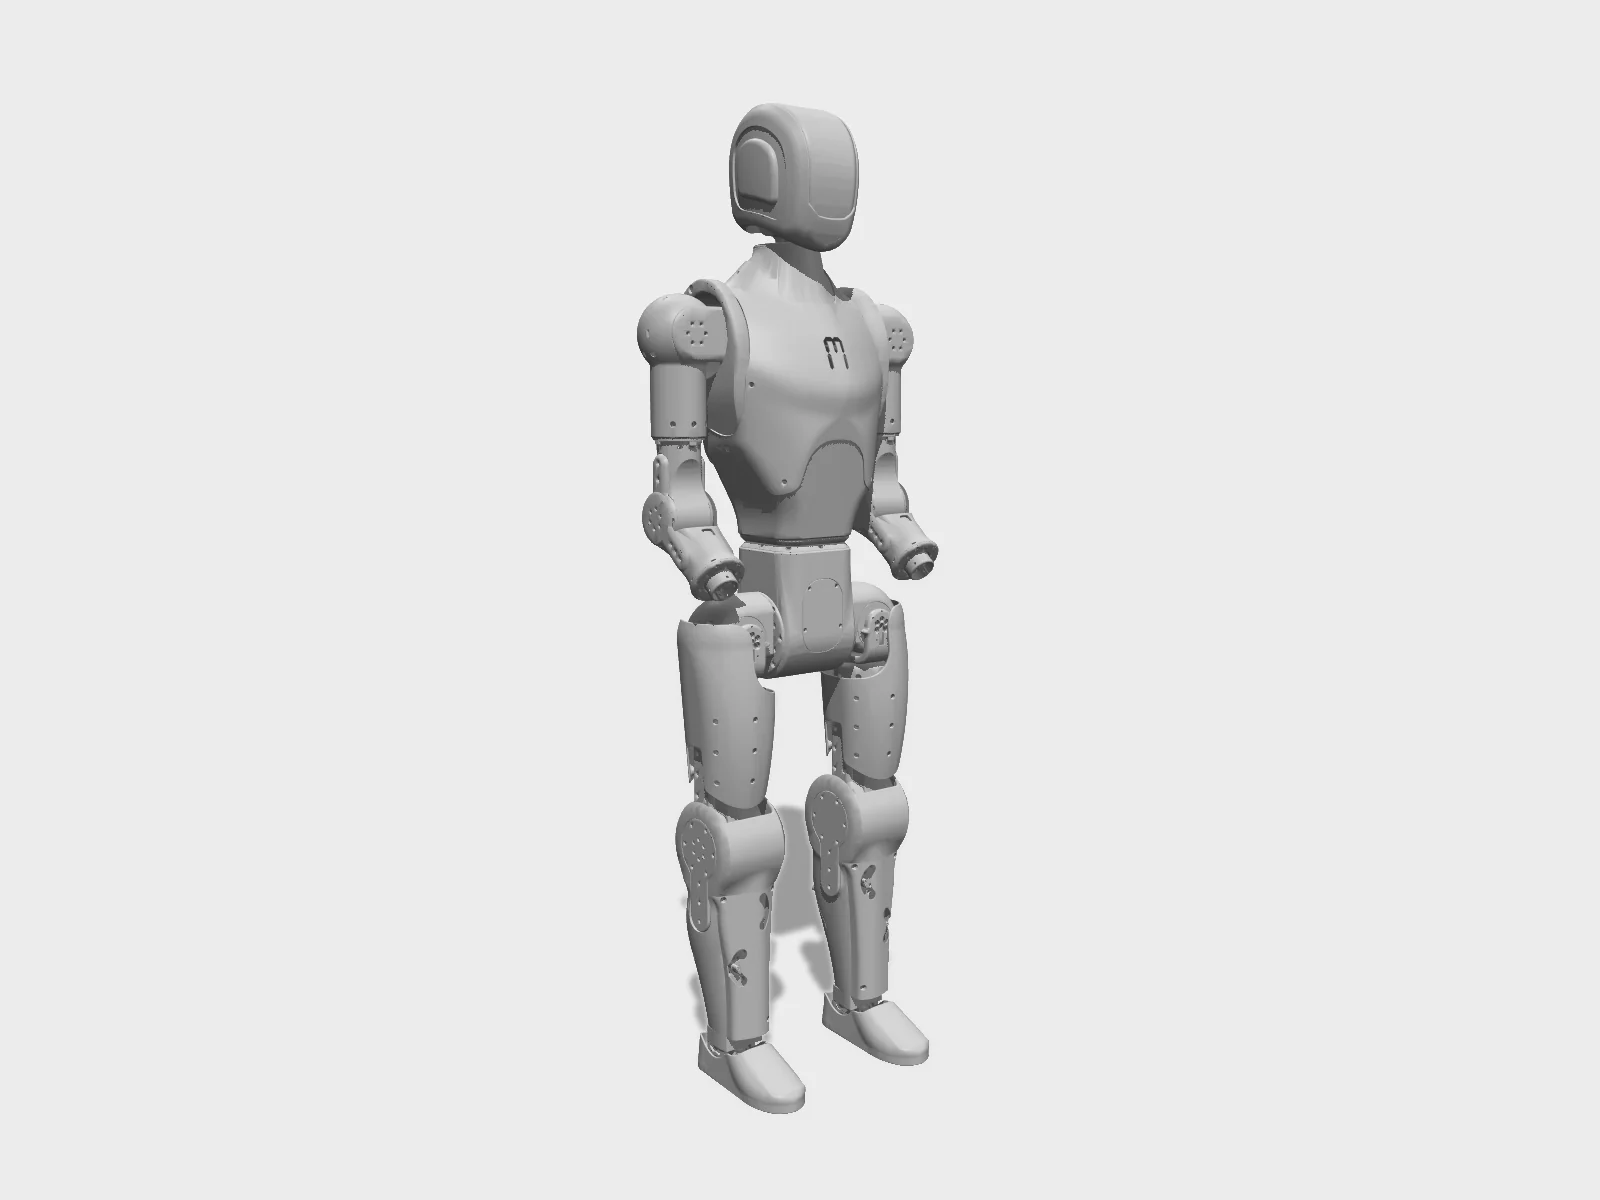
- Drawing
- /menlo/asimov
- Maker
- Menlo Research (Asimov)
- Country
- Singapore, SG
- Package rev
- v0.1.0
- Level
- L1 Compiled
- Availability
- Kit
- Openness
- 70/100
- HW licence
- CERN-OHL-S-2.0
- Last checked
- 2026-09-25
- Height
- 120 cm
- Mass
- 35 kg
- DOF
- 25
- Actuators
- CAN-bus actuators; 6 DOF/leg, 5 DOF/arm, 1 waist, 2 neck; RSU ankle with passive toes
Kit announced Mar 2026; CAD and sim model open-sourced Apr 2026; shipments reported from Aug 2026. Hands not included in the kit. Build pages send buyers to the maker's own kit first. Repo asimovinc/asimov-v1 redirects to menloresearch/asimov-1. bom=false: docs gate the BOM behind a request form. policies=false: the locomotion policy ships inside the RPU firmware image, not as a separate published file.
Configure
Saved in the URL. Share the link to share the build.Source
One cart across 1 vendor · prices in USD as listedMenlo Research (Asimov) sells a kit. Buying from the maker funds the people who opened the design. No BOM line below lists them as a vendor yet, so check their store before ordering parts one by one.
78 lines · 871 parts · 76 without an offer in US · 2/78 lines sourced in 2+ regions (L3 gate)
| # | Part | Category | Qty | Unit | Line | Offer |
|---|---|---|---|---|---|---|
Henkel2 lines · unpriced | ||||||
| 1 | LOCTITE 222 low-strength threadlocker other.threadlocker-loctite-222 | other | 1 | unpriced | — | Henkelships globally |
| 2 | LOCTITE 401 instant adhesive (wire retention) other.loctite-401 | other | 1 | unpriced | — | Henkelships globally |
No offer in this region76 lines · unpriced | ||||||
| 3 | Encos EC-A6416-P2-25 actuator (hip pitch, waist yaw) actuator.ec-a6416-p2-25 · MPN EC-A6416-P2-25 | actuator | 3 | unpriced | — | No offer found yet |
| 4 | Encos EC-A5013-H17-100 actuator (hip roll, shoulder pitch) actuator.ec-a5013-h17-100 · MPN EC-A5013-H17-100 | actuator | 4 | unpriced | — | No offer found yet |
| 5 | Encos EC-A3814-H14-107 actuator (hip yaw, shoulder yaw) actuator.ec-a3814-h14-107 · MPN EC-A3814-H14-107 | actuator | 4 | unpriced | — | No offer found yet |
| 6 | Encos EC-A4315-P2-36 actuator (knee, shoulder roll) actuator.ec-a4315-p2-36 · MPN EC-A4315-P2-36 | actuator | 4 | unpriced | — | No offer found yet |
| 7 | Encos EC-A4310-P2-36 actuator (ankle A/B, elbow, wrist yaw, neck yaw/pitch) actuator.ec-a4310-p2-36 · MPN EC-A4310-P2-36 | actuator | 10 | unpriced | — | No offer found yet |
| 8 | Radxa CM5 compute module (RPU, motion control) compute.radxa-cm5 · MPN Radxa CM5 | compute | 1 | unpriced | — | No offer found yet |
| 9 | Raspberry Pi 5 (media + network edge computer; part 700_09X) compute.raspberry-pi-5 · MPN Raspberry Pi 5 | compute | 1 | unpriced | — | No offer found yet |
| 10 | RPU Motion Control Board (custom CM5 carrier: 6x SPI-CAN, RS485, LSM6DSV IMU; KiCad in repo) electronics.rpu-mcb | electronics | 1 | unpriced | — | No offer found yet |
| 11 | RPU Power Distribution Board (custom, XT90(2+2) input, stacks on MCB; KiCad in repo) electronics.rpu-pdb | electronics | 1 | unpriced | — | No offer found yet |
| 12 | Head board (buck converters for RPi5 5V + audio IC; EasyEDA .epro in repo) electronics.head-board | electronics | 1 | unpriced | — | No offer found yet |
| 13 | RPi 5 hat (5V feed, button, LED, buzzer; KiCad in repo) electronics.rpi5-hat | electronics | 1 | unpriced | — | No offer found yet |
| 14 | 6-axis IMU LSM6DSV (on MCB) sensor.imu-lsm6dsv · MPN LSM6DSV | sensor | 1 | unpriced | — | No offer found yet |
| 15 | 2 MP monocular camera (part 700_10X) sensor.camera-2mp | sensor | 1 | unpriced | — | No offer found yet |
| 16 | Stereo microphone array sensor.mic-array | sensor | 1 | unpriced | — | No offer found yet |
| 17 | 10 W 4 ohm speaker (part 100_13X) electronics.speaker-10w | electronics | 1 | unpriced | — | No offer found yet |
| 18 | 13S4P Li-ion battery pack, INR18650 cells, 46.8 V nominal, 10.5 Ah, 491.4 Wh, with PCM (part 100_11X) power.battery-13s4p | power | 1 | unpriced | — | No offer found yet |
| 19 | Double-ended XT30 (2+2) cable, 100 mm (BATT+/BATT-/CAN_H/CAN_L) cable.xt30-2p2-double-100mm | cable | 6 | unpriced | — | No offer found yet |
| 20 | Double-ended XT30 (2+2) cable, 150 mm (BATT+/BATT-/CAN_H/CAN_L) cable.xt30-2p2-double-150mm | cable | 2 | unpriced | — | No offer found yet |
| 21 | Double-ended XT30 (2+2) cable, 200 mm (BATT+/BATT-/CAN_H/CAN_L) cable.xt30-2p2-double-200mm | cable | 3 | unpriced | — | No offer found yet |
| 22 | Double-ended XT30 (2+2) cable, 230 mm (BATT+/BATT-/CAN_H/CAN_L) cable.xt30-2p2-double-230mm | cable | 2 | unpriced | — | No offer found yet |
| 23 | Double-ended XT30 (2+2) cable, 300 mm (BATT+/BATT-/CAN_H/CAN_L) cable.xt30-2p2-double-300mm | cable | 3 | unpriced | — | No offer found yet |
| 24 | Double-ended XT30 (2+2) cable, 400 mm (BATT+/BATT-/CAN_H/CAN_L) cable.xt30-2p2-double-400mm | cable | 2 | unpriced | — | No offer found yet |
| 25 | Double-ended XT30 (2+2) cable, 600 mm (BATT+/BATT-/CAN_H/CAN_L) cable.xt30-2p2-double-600mm | cable | 2 | unpriced | — | No offer found yet |
| 26 | Single-ended XT30 (2+2) cable, 100 mm (BATT+/BATT-/CAN_H/CAN_L) cable.xt30-2p2-single-100mm | cable | 4 | unpriced | — | No offer found yet |
| 27 | Single-ended XT30 (2+2) cable, 180 mm (BATT+/BATT-/CAN_H/CAN_L) cable.xt30-2p2-single-180mm | cable | 6 | unpriced | — | No offer found yet |
| 28 | Single-ended XT30 (2+2) cable, 280 mm (BATT+/BATT-/CAN_H/CAN_L) cable.xt30-2p2-single-280mm | cable | 2 | unpriced | — | No offer found yet |
| 29 | RPU to RPI cable, 1000 mm (RJ45 Male / RJ45 Male) cable.misc-rpu-rpi | cable | 1 | unpriced | — | No offer found yet |
| 30 | RPU to Head Board cable, 1000 mm (XT30-F / XT30-M) cable.misc-rpu-head-board | cable | 1 | unpriced | — | No offer found yet |
| 31 | RPU to Fan cable, 100 mm (JST-XH 4 pin / SOLDER) cable.misc-rpu-fan | cable | 1 | unpriced | — | No offer found yet |
| 32 | Head Board to RPI 5 Hat cable, 120 mm (JST-XH 4 pin / JST-XH 4 pin) cable.misc-head-board-rpi-5-hat | cable | 1 | unpriced | — | No offer found yet |
| 33 | Head Board to RPI cable, 100 mm (USB-C / USB-A) cable.misc-head-board-rpi | cable | 1 | unpriced | — | No offer found yet |
| 34 | Head Board to WAGO cable, 300 mm (JST-XH 4 pin / N/A) cable.misc-head-board-wago | cable | 1 | unpriced | — | No offer found yet |
| 35 | Speaker to WAGO cable, 50 mm (SOLDER / N/A) cable.misc-speaker-wago | cable | 1 | unpriced | — | No offer found yet |
| 36 | 12 mm bore 1-side 2-post pillow block (foot pivot) hw.pillow-block-12mm | structure | 8 | unpriced | — | No offer found yet |
| 37 | 6 mm bore 1-side 2-post pillow block (ankle linkage shaft) hw.pillow-block-6mm | structure | 4 | unpriced | — | No offer found yet |
| 38 | Ball joint rod end (ankle linkage) hw.rod-end | structure | 8 | unpriced | — | No offer found yet |
| 39 | Stainless steel bar (ankle linkage) hw.ankle-steel-bar | structure | 4 | unpriced | — | No offer found yet |
| 40 | 6 mm stainless D-shaft (ankle linkage) hw.d-shaft-6mm | structure | 2 | unpriced | — | No offer found yet |
| 41 | Steel set-screw collar hw.set-screw-collar | structure | 4 | unpriced | — | No offer found yet |
| 42 | Flanged ball bearing McMaster 4390N159 (shoulder bearing housing) hw.bearing-4390n159 · MPN McMaster-Carr 4390N159 | structure | 2 | unpriced | — | No offer found yet |
| 43 | Chain shackle (installed in torso shell with M6x85 bolts) hw.chain-shackle | structure | 2 | unpriced | — | No offer found yet |
| 44 | WAGO connector (arm wire joins) hw.wago-connector | cable | 8 | unpriced | — | No offer found yet |
| 45 | M2.5x20 hex standoff fastener.m2.5x20-hex-standoff | fastener | 4 | unpriced | — | No offer found yet |
| 46 | M2.5x6 socket bolt fastener.m2.5x6-socket | fastener | 8 | unpriced | — | No offer found yet |
| 47 | M3x10 flat bolt fastener.m3x10-flat | fastener | 36 | unpriced | — | No offer found yet |
| 48 | M3x12 flat bolt fastener.m3x12-flat | fastener | 149 | unpriced | — | No offer found yet |
| 49 | M3x12 socket bolt fastener.m3x12-socket | fastener | 2 | unpriced | — | No offer found yet |
| 50 | M3x16 flat bolt fastener.m3x16-flat | fastener | 24 | unpriced | — | No offer found yet |
| 51 | M3x18 socket bolt fastener.m3x18-socket | fastener | 12 | unpriced | — | No offer found yet |
| 52 | M3x20 socket bolt fastener.m3x20-socket | fastener | 10 | unpriced | — | No offer found yet |
| 53 | M3x6 socket bolt fastener.m3x6-socket | fastener | 8 | unpriced | — | No offer found yet |
| 54 | M3x8 flat bolt fastener.m3x8-flat | fastener | 4 | unpriced | — | No offer found yet |
| 55 | M4 nylon-insert locknut fastener.m4-nylon-insert-locknut | fastener | 20 | unpriced | — | No offer found yet |
| 56 | M4 square nut fastener.m4-square-nut | fastener | 28 | unpriced | — | No offer found yet |
| 57 | M4x10 flat bolt fastener.m4x10-flat | fastener | 44 | unpriced | — | No offer found yet |
| 58 | M4x10 socket bolt fastener.m4x10-socket | fastener | 16 | unpriced | — | No offer found yet |
| 59 | M4x12 flat bolt fastener.m4x12-flat | fastener | 22 | unpriced | — | No offer found yet |
| 60 | M4x12 socket bolt fastener.m4x12-socket | fastener | 24 | unpriced | — | No offer found yet |
| 61 | M4x14 flat bolt fastener.m4x14-flat | fastener | 24 | unpriced | — | No offer found yet |
| 62 | M4x14 socket bolt fastener.m4x14-socket | fastener | 41 | unpriced | — | No offer found yet |
| 63 | M4x16 flat bolt fastener.m4x16-flat | fastener | 58 | unpriced | — | No offer found yet |
| 64 | M4x16 socket bolt fastener.m4x16-socket | fastener | 23 | unpriced | — | No offer found yet |
| 65 | M4x18 socket bolt fastener.m4x18-socket | fastener | 8 | unpriced | — | No offer found yet |
| 66 | M4x20 flat bolt fastener.m4x20-flat | fastener | 2 | unpriced | — | No offer found yet |
| 67 | M4x20 socket bolt fastener.m4x20-socket | fastener | 18 | unpriced | — | No offer found yet |
| 68 | M4x25 socket bolt fastener.m4x25-socket | fastener | 30 | unpriced | — | No offer found yet |
| 69 | M4x45 socket bolt fastener.m4x45-socket | fastener | 24 | unpriced | — | No offer found yet |
| 70 | M4x6 socket bolt fastener.m4x6-socket | fastener | 12 | unpriced | — | No offer found yet |
| 71 | M4x8 flat bolt fastener.m4x8-flat | fastener | 36 | unpriced | — | No offer found yet |
| 72 | M4x8 socket bolt fastener.m4x8-socket | fastener | 26 | unpriced | — | No offer found yet |
| 73 | M5x25 socket bolt fastener.m5x25-socket | fastener | 22 | unpriced | — | No offer found yet |
| 74 | M6 nylon-insert locknut fastener.m6-nylon-insert-locknut | fastener | 6 | unpriced | — | No offer found yet |
| 75 | M6x25 flat bolt fastener.m6x25-flat | fastener | 4 | unpriced | — | No offer found yet |
| 76 | M6x85 socket bolt fastener.m6x85-socket | fastener | 2 | unpriced | — | No offer found yet |
| 77 | RPU mounting bolt (size not stated) fastener.rpu-mounting-bolt-size-not-stated | fastener | 4 | unpriced | — | No offer found yet |
| 78 | Heat-shrink tubing (3M FP-301 assortment) + SAC305 lead-free solder other.heat-shrink | other | 1 | unpriced | — | No offer found yet |
| Cart total · US | 871 | $0.00 | 78 lines unpriced, not in total | |||
Fabricate
Planned for a 256 mm bed- Fabricated parts
- 98
- Print time (sum)
- —
- Material (sum)
- —
- Plates · estimate
- —
No plate estimate: the package does not list grams per part yet, and we will not guess them. Slice the source files for your 256 mm bed.
| Part | Process | Material | Qty | h / part | g / part | Profile |
|---|---|---|---|---|---|---|
ASV1_100_02A (torso, waist plate) fab.asv1-100_02a | CNC | Aluminum 7075 (CNC machining (method A)) | 1 | — | — | source |
ASV1_100_03A (torso) fab.asv1-100_03a | CNC | Aluminum 7075 (CNC machining (method A)) | 1 | — | — | source |
ASV1_100_05A (torso, left mounting plate) fab.asv1-100_05a | CNC | Aluminum 7075 (CNC machining (method A)) | 1 | — | — | source |
ASV1_100_08A (torso, right mounting plate) fab.asv1-100_08a | CNC | Aluminum 7075 (CNC machining (method A)) | 1 | — | — | source |
ASV1_100_01C (torso) fab.asv1-100_01c | SLS | PA12 nylon (3D print - MJF (method C)) | 1 | — | — | source |
ASV1_100_04C (torso, rear torso cover) fab.asv1-100_04c | SLS | PA12 nylon (3D print - MJF (method C)) | 1 | — | — | source |
ASV1_100_06C (torso, front torso cover) fab.asv1-100_06c | SLS | PA12 nylon (3D print - MJF (method C)) | 1 | — | — | source |
ASV1_100_10C (torso, battery enclosure) fab.asv1-100_10c | SLS | PA12 nylon (3D print - MJF (method C)) | 1 | — | — | source |
ASV1_100_12C (torso, enclosure cover) fab.asv1-100_12c | SLS | PA12 nylon (3D print - MJF (method C)) | 1 | — | — | source |
ASV1_100_16C (torso) fab.asv1-100_16c | SLS | PA12 nylon (3D print - MJF (method C)) | 1 | — | — | source |
ASV1_200_02A (waist/pelvis) fab.asv1-200_02a | CNC | Aluminum 7075 (CNC machining (method A)) | 1 | — | — | source |
ASV1_200_03A (waist/pelvis) fab.asv1-200_03a | CNC | Aluminum 7075 (CNC machining (method A)) | 1 | — | — | source |
ASV1_200_16A (waist/pelvis) fab.asv1-200_16a | CNC | Aluminum 7075 (CNC machining (method A)) | 1 | — | — | source |
ASV1_200_01C (waist/pelvis) fab.asv1-200_01c | SLS | PA12 nylon (3D print - MJF (method C)) | 1 | — | — | source |
ASV1_200_06C (waist/pelvis) fab.asv1-200_06c | SLS | PA12 nylon (3D print - MJF (method C)) | 1 | — | — | source |
ASV1_200_07C (waist/pelvis) fab.asv1-200_07c | SLS | PA12 nylon (3D print - MJF (method C)) | 1 | — | — | source |
ASV1_200_08C (waist/pelvis) fab.asv1-200_08c | SLS | PA12 nylon (3D print - MJF (method C)) | 1 | — | — | source |
ASV1_200_09C (waist/pelvis) fab.asv1-200_09c | SLS | PA12 nylon (3D print - MJF (method C)) | 1 | — | — | source |
ASV1_200_15C (waist/pelvis) fab.asv1-200_15c | SLS | PA12 nylon (3D print - MJF (method C)) | 1 | — | — | source |
ASV1_200_04B (waist/pelvis) fab.asv1-200_04b | SLS | 316L stainless steel (3D print - SLM metal (method B)) | 1 | — | — | source |
ASV1_200_05B (waist/pelvis) fab.asv1-200_05b | SLS | 316L stainless steel (3D print - SLM metal (method B)) | 1 | — | — | source |
ASV1_300_01A (right arm) fab.asv1-300_01a | CNC | Aluminum 7075 (CNC machining (method A)) | 1 | — | — | source |
ASV1_300_02A (right arm) fab.asv1-300_02a | CNC | Aluminum 7075 (CNC machining (method A)) | 1 | — | — | source |
ASV1_300_03A (right arm) fab.asv1-300_03a | CNC | Aluminum 7075 (CNC machining (method A)) | 1 | — | — | source |
ASV1_300_05A (right arm) fab.asv1-300_05a | CNC | Aluminum 7075 (CNC machining (method A)) | 1 | — | — | source |
ASV1_300_07A (right arm) fab.asv1-300_07a | CNC | Aluminum 7075 (CNC machining (method A)) | 1 | — | — | source |
ASV1_300_08A (right arm) fab.asv1-300_08a | CNC | Aluminum 7075 (CNC machining (method A)) | 1 | — | — | source |
ASV1_300_09A (right arm) fab.asv1-300_09a | CNC | Aluminum 7075 (CNC machining (method A)) | 1 | — | — | source |
ASV1_300_10A (right arm) fab.asv1-300_10a | CNC | Aluminum 7075 (CNC machining (method A)) | 1 | — | — | source |
ASV1_300_11A (right arm) fab.asv1-300_11a | CNC | Aluminum 7075 (CNC machining (method A)) | 1 | — | — | source |
ASV1_300_13C (right arm) fab.asv1-300_13c | SLS | PA12 nylon (3D print - MJF (method C)) | 1 | — | — | source |
ASV1_300_14C (right arm) fab.asv1-300_14c | SLS | PA12 nylon (3D print - MJF (method C)) | 1 | — | — | source |
ASV1_300_15C (right arm) fab.asv1-300_15c | SLS | PA12 nylon (3D print - MJF (method C)) | 1 | — | — | source |
ASV1_300_16C (right arm) fab.asv1-300_16c | SLS | PA12 nylon (3D print - MJF (method C)) | 1 | — | — | source |
ASV1_300_04B (right arm) fab.asv1-300_04b | SLS | 316L stainless steel (3D print - SLM metal (method B)) | 1 | — | — | source |
ASV1_300_06B (right arm) fab.asv1-300_06b | SLS | 316L stainless steel (3D print - SLM metal (method B)) | 1 | — | — | source |
ASV1_300_12B (right arm) fab.asv1-300_12b | SLS | 316L stainless steel (3D print - SLM metal (method B)) | 1 | — | — | source |
ASV1_400_01A (left arm) fab.asv1-400_01a | CNC | Aluminum 7075 (CNC machining (method A)) | 1 | — | — | source |
ASV1_400_02A (left arm) fab.asv1-400_02a | CNC | Aluminum 7075 (CNC machining (method A)) | 1 | — | — | source |
ASV1_400_03A (left arm) fab.asv1-400_03a | CNC | Aluminum 7075 (CNC machining (method A)) | 1 | — | — | source |
ASV1_400_05A (left arm) fab.asv1-400_05a | CNC | Aluminum 7075 (CNC machining (method A)) | 1 | — | — | source |
ASV1_400_07A (left arm) fab.asv1-400_07a | CNC | Aluminum 7075 (CNC machining (method A)) | 1 | — | — | source |
ASV1_400_08A (left arm) fab.asv1-400_08a | CNC | Aluminum 7075 (CNC machining (method A)) | 1 | — | — | source |
ASV1_400_09A (left arm) fab.asv1-400_09a | CNC | Aluminum 7075 (CNC machining (method A)) | 1 | — | — | source |
ASV1_400_10A (left arm) fab.asv1-400_10a | CNC | Aluminum 7075 (CNC machining (method A)) | 1 | — | — | source |
ASV1_400_11A (left arm) fab.asv1-400_11a | CNC | Aluminum 7075 (CNC machining (method A)) | 1 | — | — | source |
ASV1_400_13C (left arm) fab.asv1-400_13c | SLS | PA12 nylon (3D print - MJF (method C)) | 1 | — | — | source |
ASV1_400_14C (left arm) fab.asv1-400_14c | SLS | PA12 nylon (3D print - MJF (method C)) | 1 | — | — | source |
ASV1_400_15C (left arm) fab.asv1-400_15c | SLS | PA12 nylon (3D print - MJF (method C)) | 1 | — | — | source |
ASV1_400_16C (left arm) fab.asv1-400_16c | SLS | PA12 nylon (3D print - MJF (method C)) | 1 | — | — | source |
ASV1_400_04B (left arm) fab.asv1-400_04b | SLS | 316L stainless steel (3D print - SLM metal (method B)) | 1 | — | — | source |
ASV1_400_06B (left arm) fab.asv1-400_06b | SLS | 316L stainless steel (3D print - SLM metal (method B)) | 1 | — | — | source |
ASV1_400_12B (left arm) fab.asv1-400_12b | SLS | 316L stainless steel (3D print - SLM metal (method B)) | 1 | — | — | source |
ASV1_500_05A (right leg) fab.asv1-500_05a | CNC | Aluminum 7075 (CNC machining (method A)) | 1 | — | — | source |
ASV1_500_06A (right leg) fab.asv1-500_06a | CNC | Aluminum 7075 (CNC machining (method A)) | 1 | — | — | source |
ASV1_500_08A (right leg) fab.asv1-500_08a | CNC | Aluminum 7075 (CNC machining (method A)) | 1 | — | — | source |
ASV1_500_09A (right leg) fab.asv1-500_09a | CNC | Aluminum 7075 (CNC machining (method A)) | 1 | — | — | source |
ASV1_500_12A (right leg) fab.asv1-500_12a | CNC | Aluminum 7075 (CNC machining (method A)) | 1 | — | — | source |
ASV1_500_23A_SS (right leg) fab.asv1-500_23a-ss | CNC | Aluminum 7075 (CNC machining (method A)) | 1 | — | — | source |
ASV1_500_24A_SS (right leg) fab.asv1-500_24a-ss | CNC | Aluminum 7075 (CNC machining (method A)) | 1 | — | — | source |
ASV1_500_25A (right leg) fab.asv1-500_25a | CNC | Aluminum 7075 (CNC machining (method A)) | 1 | — | — | source |
ASV1_500_36A (right leg) fab.asv1-500_36a | CNC | Aluminum 7075 (CNC machining (method A)) | 1 | — | — | source |
ASV1_500_03C (right leg) fab.asv1-500_03c | SLS | PA12 nylon (3D print - MJF (method C)) | 1 | — | — | source |
ASV1_500_04C (right leg) fab.asv1-500_04c | SLS | PA12 nylon (3D print - MJF (method C)) | 1 | — | — | source |
ASV1_500_10C (right leg) fab.asv1-500_10c | SLS | PA12 nylon (3D print - MJF (method C)) | 1 | — | — | source |
ASV1_500_13C (right leg) fab.asv1-500_13c | SLS | PA12 nylon (3D print - MJF (method C)) | 1 | — | — | source |
ASV1_500_37C (right leg) fab.asv1-500_37c | SLS | PA12 nylon (3D print - MJF (method C)) | 1 | — | — | source |
ASV1_500_39C (right leg) fab.asv1-500_39c | SLS | PA12 nylon (3D print - MJF (method C)) | 1 | — | — | source |
ASV1_500_01B (right leg) fab.asv1-500_01b | SLS | 316L stainless steel (3D print - SLM metal (method B)) | 1 | — | — | source |
ASV1_500_17B (right leg) fab.asv1-500_17b | SLS | 316L stainless steel (3D print - SLM metal (method B)) | 1 | — | — | source |
ASV1_500_18B (right leg) fab.asv1-500_18b | SLS | 316L stainless steel (3D print - SLM metal (method B)) | 1 | — | — | source |
ASV1_500_26B (right leg) fab.asv1-500_26b | SLS | 316L stainless steel (3D print - SLM metal (method B)) | 1 | — | — | source |
ASV1_600_05A (left leg) fab.asv1-600_05a | CNC | Aluminum 7075 (CNC machining (method A)) | 1 | — | — | source |
ASV1_600_06A (left leg) fab.asv1-600_06a | CNC | Aluminum 7075 (CNC machining (method A)) | 1 | — | — | source |
ASV1_600_08A (left leg) fab.asv1-600_08a | CNC | Aluminum 7075 (CNC machining (method A)) | 1 | — | — | source |
ASV1_600_09A (left leg) fab.asv1-600_09a | CNC | Aluminum 7075 (CNC machining (method A)) | 1 | — | — | source |
ASV1_600_12A (left leg) fab.asv1-600_12a | CNC | Aluminum 7075 (CNC machining (method A)) | 1 | — | — | source |
ASV1_600_23A_SS (left leg) fab.asv1-600_23a-ss | CNC | Aluminum 7075 (CNC machining (method A)) | 1 | — | — | source |
ASV1_600_24A_SS (left leg) fab.asv1-600_24a-ss | CNC | Aluminum 7075 (CNC machining (method A)) | 1 | — | — | source |
ASV1_600_25A (left leg) fab.asv1-600_25a | CNC | Aluminum 7075 (CNC machining (method A)) | 1 | — | — | source |
ASV1_600_36A (left leg) fab.asv1-600_36a | CNC | Aluminum 7075 (CNC machining (method A)) | 1 | — | — | source |
ASV1_600_03C (left leg) fab.asv1-600_03c | SLS | PA12 nylon (3D print - MJF (method C)) | 1 | — | — | source |
ASV1_600_04C (left leg) fab.asv1-600_04c | SLS | PA12 nylon (3D print - MJF (method C)) | 1 | — | — | source |
ASV1_600_10C (left leg) fab.asv1-600_10c | SLS | PA12 nylon (3D print - MJF (method C)) | 1 | — | — | source |
ASV1_600_13C (left leg) fab.asv1-600_13c | SLS | PA12 nylon (3D print - MJF (method C)) | 1 | — | — | source |
ASV1_600_37C (left leg) fab.asv1-600_37c | SLS | PA12 nylon (3D print - MJF (method C)) | 1 | — | — | source |
ASV1_600_39C (left leg) fab.asv1-600_39c | SLS | PA12 nylon (3D print - MJF (method C)) | 1 | — | — | source |
ASV1_600_01B (left leg) fab.asv1-600_01b | SLS | 316L stainless steel (3D print - SLM metal (method B)) | 1 | — | — | source |
ASV1_600_17B (left leg) fab.asv1-600_17b | SLS | 316L stainless steel (3D print - SLM metal (method B)) | 1 | — | — | source |
ASV1_600_18B (left leg) fab.asv1-600_18b | SLS | 316L stainless steel (3D print - SLM metal (method B)) | 1 | — | — | source |
ASV1_600_26B (left leg) fab.asv1-600_26b | SLS | 316L stainless steel (3D print - SLM metal (method B)) | 1 | — | — | source |
ASV1_700_03C (head, head base) fab.asv1-700_03c | SLS | PA12 nylon (3D print - MJF (method C)) | 1 | — | — | source |
ASV1_700_04C (head, top head cover) fab.asv1-700_04c | SLS | PA12 nylon (3D print - MJF (method C)) | 1 | — | — | source |
ASV1_700_05C (head, head carrier) fab.asv1-700_05c | SLS | PA12 nylon (3D print - MJF (method C)) | 1 | — | — | source |
ASV1_700_06C (head, left head cover) fab.asv1-700_06c | SLS | PA12 nylon (3D print - MJF (method C)) | 1 | — | — | source |
ASV1_700_07C (head, right head cover) fab.asv1-700_07c | SLS | PA12 nylon (3D print - MJF (method C)) | 1 | — | — | source |
ASV1_700_01B (head) fab.asv1-700_01b | SLS | 316L stainless steel (3D print - SLM metal (method B)) | 1 | — | — | source |
ASV1_700_02B (head) fab.asv1-700_02b | SLS | 316L stainless steel (3D print - SLM metal (method B)) | 1 | — | — | source |
Assemble
Every step ends in a check- Steps
- 14
- Subassemblies
- 8
- Hands-on time (sum)
- 2 h
- Critical path
- 2 h
- Your progress · this device
- —
13 steps have no time estimate; times above are lower bounds.
Steps, in build order
- preparation01
Prepare tools and supplies
Set up the workbench with the required tools and consumables: Allen keys (a set is included with the kit), soldering gear, heat-shrink, LOCTITE 222 threadlocker and LOCTITE 401 adhesive. Brands are references only.
CHECKEvery item on the Required Tools list is on the bench, including a working multimeter and a 2-6 mm hex key set.- Parts in
- LOCTITE 222 low-strength threadlockerother.threadlocker-loctite-222
- LOCTITE 401 instant adhesive (wire retention)other.loctite-401
- Heat-shrink tubing (3M FP-301 assortment) + SAC305 lead-free solderother.heat-shrink
- Tools
- metric Allen keys 2/2.5/3/4/5/6 mm (included), Phillips screwdriver, flush cutters, wire strippers, heat gun, soldering iron + third hand, digital multimeter, masking/paper tape
- Torque
- —
- Time
- —
- After
- Start
- Source
- docs.menlo.ai
- software02
Flash the RPU (Radxa CM5)
Safety · human-verified requiredHold the RPU MaskROM button, then connect battery power last. Load rk3588_spl_loader v1.15.113 and write asimov-rpu-<version>.img to onboard storage with rkdeveloptool (db, wl 0, rd). Use RPU and RPi images from the same release.
CHECK`rkdeveloptool ld` shows Mode=Maskrom; the loader reports 'Downloading bootloader succeeded', the write reaches 100%, and reset prints 'Reset Device OK'.This step can hurt a person or ruin parts. Its instructions need sign-off by a human who has done it before relying on them. Stop and ask if anything differs from what you see.
- Parts in
- Radxa CM5 compute module (RPU, motion control)compute.radxa-cm5
- RPU Motion Control Board (custom CM5 carrier: 6x SPI-CAN, RS485, LSM6DSV IMU; KiCad in repo)electronics.rpu-mcb
- RPU Power Distribution Board (custom, XT90(2+2) input, stacks on MCB; KiCad in repo)electronics.rpu-pdb
- Tools
- rkdeveloptool or RKDevTool v2.96, data-capable USB-C cable
- Torque
- —
- Time
- —
- After
- Start
- Source
- docs.menlo.ai
- 03
Flash the Raspberry Pi 5 microSD
In Raspberry Pi Imager, load the paired asimov rpi-imager-manifest as a custom content repository and select Asimov RPi. Set a unique hostname, a non-reserved username and password, Wi-Fi and SSH, then write and verify.
CHECKImager finishes writing and verifying without errors, and the hostname you chose is recorded for http://<name>.local:8080.- Parts in
- Raspberry Pi 5 (media + network edge computer; part 700_09X)compute.raspberry-pi-5
- Tools
- Raspberry Pi Imager, microSD >= 32 GB
- Torque
- —
- Time
- —
- After
- Start
- Source
- docs.menlo.ai
- 04
Connect both computers and open the dashboard
Safety · human-verified requiredLink the Raspberry Pi 5 and the RPU with a direct Ethernet cable, power both boards, and wait about two minutes. Open http://<name>.local:8080 (or the asimov-XXXX fallback at 10.42.0.1:8080) and sign in.
CHECKIn First-Run Setup, Go to Firmware shows the RPU online with green Network (ping) and Control dots.This step can hurt a person or ruin parts. Its instructions need sign-off by a human who has done it before relying on them. Stop and ask if anything differs from what you see.
- Parts in
- RPU to RPI cable, 1000 mm (RJ45 Male / RJ45 Male)cable.misc-rpu-rpi
- Tools
- —
- Torque
- —
- Time
- —
- Source
- docs.menlo.ai
- 05
Assign all 25 motor IDs
Safety · human-verified requiredApply the asimov_1_biped profile and enable ID assignment. Connect one motor at a time to RPU port LL, Detect it, set Target ID to the number on its sticker (1-25), then Set & verify. The docs estimate about two hours for the whole setup, mostly this step.
CHECKAll 25 unique sticker IDs read back correctly after Set & verify, and the motors are kept in ID order.This step can hurt a person or ruin parts. Its instructions need sign-off by a human who has done it before relying on them. Stop and ask if anything differs from what you see.
- Parts in
- Encos EC-A6416-P2-25 actuator (hip pitch, waist yaw)actuator.ec-a6416-p2-25
- Encos EC-A5013-H17-100 actuator (hip roll, shoulder pitch)actuator.ec-a5013-h17-100
- Encos EC-A3814-H14-107 actuator (hip yaw, shoulder yaw)actuator.ec-a3814-h14-107
- Encos EC-A4315-P2-36 actuator (knee, shoulder roll)actuator.ec-a4315-p2-36
- Encos EC-A4310-P2-36 actuator (ankle A/B, elbow, wrist yaw, neck yaw/pitch)actuator.ec-a4310-p2-36
- Tools
- —
- Torque
- —
- Time
- 2 h
- After
- 04
- Source
- docs.menlo.ai
- electrical06
Review cable chains and hollow-shaft routing
Safety · human-verified requiredKeep the battery disconnected throughout. There are six daisy-chain branches (both legs, waist, both arms, neck), and each actuator has two equivalent XT30 (2+2) ports carrying BATT+/BATT-/CAN_H/CAN_L. The single-ended cables for hip roll, hip yaw and shoulder pitch must be routed through the hollow shafts before they are joined.
CHECKThe battery is disconnected and protected, the six branch entries are identified, and the single-ended hollow-shaft cables are still unjoined and grouped with their modules.This step can hurt a person or ruin parts. Its instructions need sign-off by a human who has done it before relying on them. Stop and ask if anything differs from what you see.
- Parts in
- Double-ended XT30 (2+2) cable, 100 mm (BATT+/BATT-/CAN_H/CAN_L)cable.xt30-2p2-double-100mm
- Double-ended XT30 (2+2) cable, 150 mm (BATT+/BATT-/CAN_H/CAN_L)cable.xt30-2p2-double-150mm
- Double-ended XT30 (2+2) cable, 200 mm (BATT+/BATT-/CAN_H/CAN_L)cable.xt30-2p2-double-200mm
- Double-ended XT30 (2+2) cable, 230 mm (BATT+/BATT-/CAN_H/CAN_L)cable.xt30-2p2-double-230mm
- Double-ended XT30 (2+2) cable, 300 mm (BATT+/BATT-/CAN_H/CAN_L)cable.xt30-2p2-double-300mm
- Double-ended XT30 (2+2) cable, 400 mm (BATT+/BATT-/CAN_H/CAN_L)cable.xt30-2p2-double-400mm
- Double-ended XT30 (2+2) cable, 600 mm (BATT+/BATT-/CAN_H/CAN_L)cable.xt30-2p2-double-600mm
- Single-ended XT30 (2+2) cable, 100 mm (BATT+/BATT-/CAN_H/CAN_L)cable.xt30-2p2-single-100mm
- Single-ended XT30 (2+2) cable, 180 mm (BATT+/BATT-/CAN_H/CAN_L)cable.xt30-2p2-single-180mm
- Single-ended XT30 (2+2) cable, 280 mm (BATT+/BATT-/CAN_H/CAN_L)cable.xt30-2p2-single-280mm
- Tools
- —
- Torque
- —
- Time
- —
- After
- 05
- Source
- docs.menlo.ai
- legs07
Build the left leg module (IDs 3,4,5,6)
Sub-assembly A: hip yaw (ID 3) with its 280 mm cable through the shaft, knee (ID 4), then parts 600_06A and 600_12A and the outer housing 600_04C (17 bolts). Then build the knee housing with ankle actuators A/B (IDs 5, 6) and the linkage cranks, the foot pivot on four 12 mm pillow blocks, and the D-shaft linkage. Join the ankle assemblies with rod ends and steel bars.
CHECKThe ankle pitch and roll move through the parallel linkage without binding, and the XT30 chain runs hip yaw -> knee -> ankle A -> ankle B.- Parts in
- Encos EC-A3814-H14-107 actuator (hip yaw, shoulder yaw)actuator.ec-a3814-h14-107
- Encos EC-A4315-P2-36 actuator (knee, shoulder roll)actuator.ec-a4315-p2-36
- Encos EC-A4310-P2-36 actuator (ankle A/B, elbow, wrist yaw, neck yaw/pitch)actuator.ec-a4310-p2-36
- 12 mm bore 1-side 2-post pillow block (foot pivot)hw.pillow-block-12mm
- 6 mm bore 1-side 2-post pillow block (ankle linkage shaft)hw.pillow-block-6mm
- Ball joint rod end (ankle linkage)hw.rod-end
- Stainless steel bar (ankle linkage)hw.ankle-steel-bar
- 6 mm stainless D-shaft (ankle linkage)hw.d-shaft-6mm
- Steel set-screw collarhw.set-screw-collar
- Tools
- hex keys, threadlocker
- Torque
- —
- Time
- —
- After
- 06
- Source
- docs.menlo.ai
- 08
Build the right leg module (IDs 9,10,11,12)
Mirror the left leg procedure using the 500_xx parts: hip yaw ID 9, knee ID 10, and ankle actuators ID 11 and ID 12. Threadlock the specified bolts and tighten them in a star pattern.
CHECKActuator IDs on the stickers match the step (9-12), and the linkage moves freely.- Parts in
- Encos EC-A3814-H14-107 actuator (hip yaw, shoulder yaw)actuator.ec-a3814-h14-107
- Encos EC-A4315-P2-36 actuator (knee, shoulder roll)actuator.ec-a4315-p2-36
- Encos EC-A4310-P2-36 actuator (ankle A/B, elbow, wrist yaw, neck yaw/pitch)actuator.ec-a4310-p2-36
- Tools
- —
- Torque
- —
- Time
- —
- After
- 06
- Source
- docs.menlo.ai
- arms09
Build left and right arm modules (IDs 13-17, 18-22)
For each arm, mount the shoulder pitch actuator in 400_04B/300_04B, build the bearing housing with the 4390N159 flanged bearing, and seat shoulder roll and yaw. Solder the shoulder pitch to shoulder roll leads, then add the elbow and wrist yaw. Join the shoulder yaw and elbow leads with four WAGO connectors and stage twelve M4x45 bolts for torso mounting.
CHECKEach arm reaches its limits (e.g. elbow 0-2.44 rad) without the cables pulling, and 12 M4x45 bolts are bagged with each arm.- Parts in
- Encos EC-A5013-H17-100 actuator (hip roll, shoulder pitch)actuator.ec-a5013-h17-100
- Encos EC-A4315-P2-36 actuator (knee, shoulder roll)actuator.ec-a4315-p2-36
- Encos EC-A3814-H14-107 actuator (hip yaw, shoulder yaw)actuator.ec-a3814-h14-107
- Encos EC-A4310-P2-36 actuator (ankle A/B, elbow, wrist yaw, neck yaw/pitch)actuator.ec-a4310-p2-36
- Flanged ball bearing McMaster 4390N159 (shoulder bearing housing)hw.bearing-4390n159
- WAGO connector (arm wire joins)hw.wago-connector
- Tools
- —
- Torque
- —
- Time
- —
- After
- 06
- Source
- docs.menlo.ai
- pelvis10
Build the pelvis and attach both legs
Safety · human-verified requiredMount waist yaw (ID 23) and the left/right hip pitch actuators (IDs 1, 7) in the pelvis housing 200_01C, route and label the cables, and fit the hip roll actuators (IDs 2, 8). Solder the hip roll leads to the hip yaw leads, insulate the joints, then fix each leg with five threadlocked M5x25 socket bolts.
CHECKEvery soldered conductor join is heat-shrunk with no exposed copper, continuity is correct with no shorts between BATT+/BATT-/CAN_H/CAN_L, and five M5x25 bolts hold each leg.This step can hurt a person or ruin parts. Its instructions need sign-off by a human who has done it before relying on them. Stop and ask if anything differs from what you see.
- Parts in
- Encos EC-A6416-P2-25 actuator (hip pitch, waist yaw)actuator.ec-a6416-p2-25
- Encos EC-A5013-H17-100 actuator (hip roll, shoulder pitch)actuator.ec-a5013-h17-100
- M5x25 socket boltfastener.m5x25-socket
- Tools
- —
- Torque
- —
- Time
- —
- Source
- docs.menlo.ai
- torso11
Assemble torso, attach arms and join to pelvis
Fit the chain shackles and waist plate 100_02A to torso shell 100_01C, then install neck yaw (ID 24) and the speaker. Attach both arm modules with plates 100_05A/100_08A and 24 M4x45 bolts, then secure the waist plate to waist yaw ID 23 with six M4x20 bolts.
CHECKThe torso rotates on waist yaw without rubbing, and all 24 M4x45 arm bolts are threadlocked and tight.- Parts in
- Chain shackle (installed in torso shell with M6x85 bolts)hw.chain-shackle
- 10 W 4 ohm speaker (part 100_13X)electronics.speaker-10w
- M4x45 socket boltfastener.m4x45-socket
- M4x20 socket boltfastener.m4x20-socket
- Tools
- —
- Torque
- —
- Time
- —
- Source
- docs.menlo.ai
- electrical12
Install RPU, head, camera and Raspberry Pi 5
Safety · human-verified requiredMount the RPU and plug the pelvis, shoulder and neck cables into the labelled ports (LL, RL, LA, RA, W, NY, NP). Fit neck pitch (ID 25) and head base 700_03C, mount the camera and Pi 5 on carrier 700_05C, route power and Ethernet to the RPU, and close the head covers.
CHECKEvery branch connector sits in the RPU port matching its label, and the Ethernet and RPi power cables reach without strain through the full neck yaw/pitch range.This step can hurt a person or ruin parts. Its instructions need sign-off by a human who has done it before relying on them. Stop and ask if anything differs from what you see.
- Parts in
- Radxa CM5 compute module (RPU, motion control)compute.radxa-cm5
- RPU Motion Control Board (custom CM5 carrier: 6x SPI-CAN, RS485, LSM6DSV IMU; KiCad in repo)electronics.rpu-mcb
- RPU Power Distribution Board (custom, XT90(2+2) input, stacks on MCB; KiCad in repo)electronics.rpu-pdb
- Encos EC-A4310-P2-36 actuator (ankle A/B, elbow, wrist yaw, neck yaw/pitch)actuator.ec-a4310-p2-36
- Raspberry Pi 5 (media + network edge computer; part 700_09X)compute.raspberry-pi-5
- 2 MP monocular camera (part 700_10X)sensor.camera-2mp
- Head board (buck converters for RPi5 5V + audio IC; EasyEDA .epro in repo)electronics.head-board
- M2.5x20 hex standofffastener.m2.5x20-hex-standoff
- Tools
- —
- Torque
- —
- Time
- —
- Source
- docs.menlo.ai
- 13
Install battery assembly and torso covers
Safety · human-verified requiredAssemble the 13S4P battery 100_11X into enclosure 100_10C/100_12C, slot it into the torso, and fix it with two M4x20 flat bolts. Fit the front and rear covers with twelve M4x8 flat bolts. Leave the battery connector unplugged from the RPU power port.
CHECKThe covers are secured, and the battery connector is visibly disconnected from the RPU power port.This step can hurt a person or ruin parts. Its instructions need sign-off by a human who has done it before relying on them. Stop and ask if anything differs from what you see.
- Parts in
- 13S4P Li-ion battery pack, INR18650 cells, 46.8 V nominal, 10.5 Ah, 491.4 Wh, with PCM (part 100_11X)power.battery-13s4p
- Tools
- —
- Torque
- —
- Time
- —
- After
- 12
- Source
- docs.menlo.ai
- bring-up14
Final mechanical integration check
Safety · human-verified requiredConfirm both legs are on the pelvis, both arms are on the torso, the torso is fixed to the pelvis, the head and RPU are installed, the covers are secured and no cable is trapped. Keep the robot mechanically supported with the battery disconnected, because Menlo has not yet published powered verification or first boot.
CHECKAll eight Finish Assembly checklist items pass, including 'battery remains disconnected' and 'robot is mechanically supported'.This step can hurt a person or ruin parts. Its instructions need sign-off by a human who has done it before relying on them. Stop and ask if anything differs from what you see.
- Parts in
- —
- Tools
- —
- Torque
- —
- Time
- —
- After
- 13
- Source
- docs.menlo.ai
Progress is stored in this browser only (localStorage). Nothing is sent anywhere.
Bring-up
Flash · calibrate · first policy- A
Flash firmware
TargetsRadxa CM5 on RPU (asimov-rpu-v<version>.img.xz via rkdeveloptool, RK3588 SPL loader v1.15.113), Raspberry Pi 5 (asimov-rpi-v<version>.img.xz via Raspberry Pi Imager manifest), 25 Encos EC-A actuators (CAN ID assignment via dashboard)
Repogithub.com/menloresearch/asimov-1
Firmware images are distributed via 'the release channel provided with your kit'; the public docs say firmware download is 'Coming soon'. RPU runs locomotion policy, motor control, IMU, BMS; RPi5 runs media/network; LiveKit/WebRTC API, telemetry 10 Hz, trajectory stream ~50 Hz, states DAMP/STAND/MOVE. CAN: 5 @ 1 Mbps + 1 @ 500 kbps (docs flag bus assignment 'under confirmation').
- B
Calibrate
CalibrationDashboard Robot Setup: apply asimov_1_biped profile, assign IDs 1-25 one motor at a time on port LL. Powered verification/first-boot procedure is 'coming soon' in docs.Log the output. It goes in your build report.
- C
First policy
- Full-body velocity locomotion (23-DOF, neck locked)Isaac Lab or MJLab templates (per docs); MuJoCo/URDF models in repo source
- Sim model for trainingMuJoCo 3.x source
- Asimov v0 12-DOF biped velocity tracking (legs-only predecessor)mjlab (MuJoCo Warp) RL source
Try the policy in the browser sim before it touches hardware. Keep a hand near the power switch the first time a policy runs on the real robot.
Report your build
Moves Asimov 1 toward L4 · BuiltA build report is the only thing that proves a package works. It raises the level, puts a point on the map, and tells the Foreman which steps to rewrite.
Level gate
Holds L1 · evidence, not confidence- L0Indexed
Known to exist. Atlas page only.
- 3 sources on record(met)
- L1Compiled
Package validates against the spec; every fact has a source.
- Build package compiled(met)
- 19 sources across robot and package(met)
- L2Sim-verified
Loads in browser and GPU sim, mass within tolerance of the BOM, holds a stand. Unlocks .training.
- URDF/MJCF is public(met)
- Sim load, mass tolerance and stand are checked on .training(checked elsewhere)
- L3Sourced
Every BOM line resolves to a live offer in at least two regions. Unlocks the one-click cart.
- 0/78 BOM lines have offers in 2+ regions(not met)
- L4Built
At least one community build report with photos and bring-up logs. Unlocks Build it as the main action.
- 0 reviewed build reports(not met)
- Review feed unreachable at last refresh; count is registry-only(checked elsewhere)
- L5Certified
The robot's maintainer signs the package. Unlocks certified teams and kit sales.
- Maintainer signature not recorded(not met)
Levels are cumulative and set by the registry from reviewed evidence. This panel shows what can be measured from the package today.
Same robot, other verbs
- Know ithumanoidrobots.systems/menlo/asimov
- Build itpartialhumanoidrobot.build/menlo/asimovCAD (98 STEP files) and assembly docs are public; the full BOM is only sent on request, so the build package is reconstructed from docs.
- Train ithumanoidrobots.training/menlo/asimov
- Find its crewhumanoidrobots.team/menlo/asimov
- See it on the maphumanoidrobots.earth/menlo/asimov
