Build package
Build SO-100 (SO-ARM100)
The Robot Studio / Hugging Face · Arm · discontinued
Original Standard Open Arm 100: a 3D-printable 6-DOF low-cost arm that served as the first reference hardware for LeRobot; superseded by the SO-101.
Build is partial: Discontinued; files public, parts may be hard to source.
Two ways to get SO-100 (SO-ARM100)
Compare all →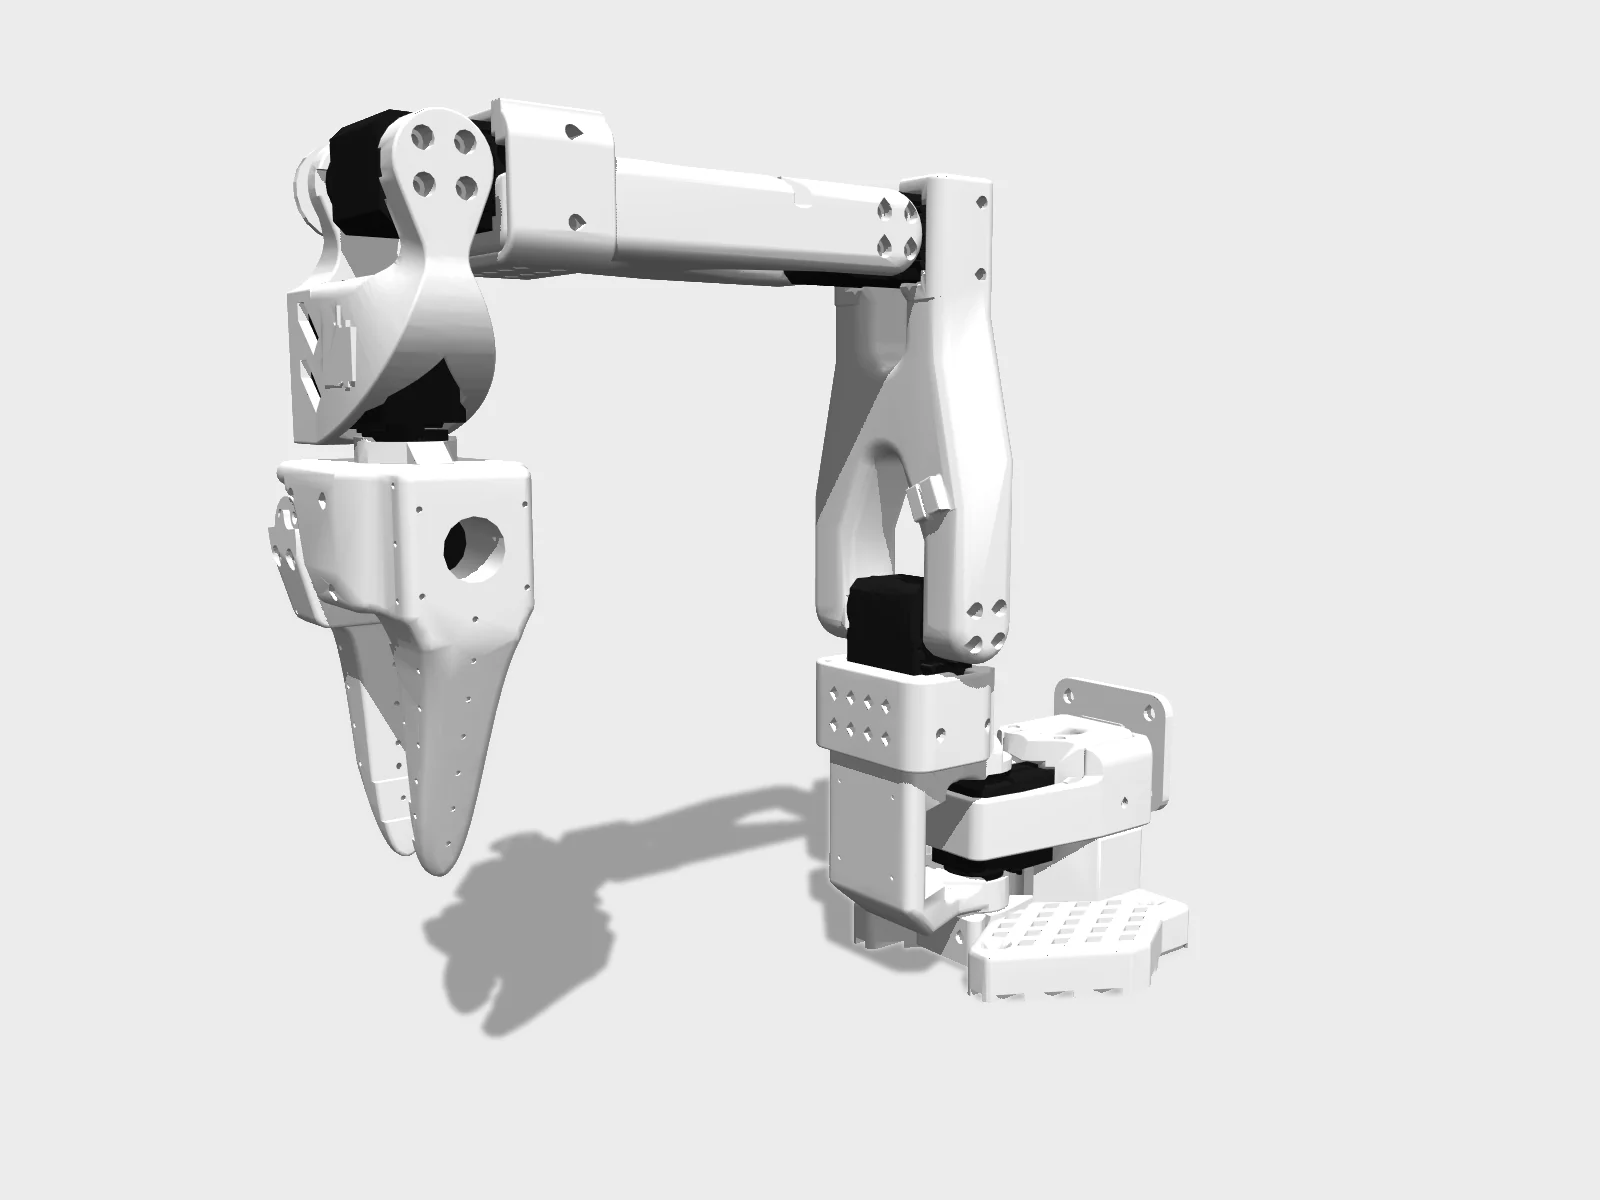
- Drawing
- /therobotstudio/so-100
- Maker
- The Robot Studio / Hugging Face
- Country
- FR
- Package rev
- v0.1.0
- Level
- L2 Sim-verified
- Availability
- DIY
- Openness
- 100/100
- HW licence
- Apache-2.0
- Last checked
- 2026-09-25
- DOF
- 6
- Actuators
- Feetech STS3215 serial bus servos
'discontinued' = superseded by SO-101 in the same repo (SO100.md kept); files remain available for DIY.
Configure
Saved in the URL. Share the link to share the build.Source
One cart across 3 vendors · prices in USD as listed8 lines · 21 parts · 0 without an offer in US · 6/8 lines sourced in 2+ regions (L3 gate)
| # | Part | Category | Qty | Unit | Line | Offer |
|---|---|---|---|---|---|---|
Alibaba (6-pack)1 line · $180.00 | ||||||
| 1 | Feetech STS3215 servo, 7.4 V (6 follower + 6 leader; gears are removed from the 6 leader units) actuator.sts3215 · MPN STS3215 · 2 alt | actuator | 12 | $15.00list price | $180.00 | Alibaba (6-pack) |
Amazon6 lines · $64.00 + 1 unpriced | ||||||
| 2 | Motor control board: Waveshare serial bus servo driver (USB-C), one per arm electronics.bus-servo-adapter | electronics | 2 | $11.00list price | $22.00 | Amazon |
| 3 | USB-C cable, 2-pack cable.usb-c | cable | 1 | $7.00list price | $7.00 | Amazon |
| 4 | DC power supply, 5 V, 5.5x2.1 mm barrel (one per arm) power.psu-5v | power | 2 | $10.00list price | $20.00 | Amazon |
| 5 | Table clamp, 4 pcs other.table-clamps | other | 1 | $9.00list price | $9.00 | Amazon |
| 6 | Precision screwdriver set (Phillips) other.screwdriver-set | other | 1 | $6.00list price | $6.00 | Amazon |
| 7 | Overhead / scene camera (optional): USB webcam sensor.scene-camera-optional | sensor | 1 | unpriced | — | AmazonRecommended model in the overhead webcam mount guide (written for the SO-100) |
Amazon (innomaker)1 line · unpriced | ||||||
| 8 | Wrist camera (optional): 32x32 mm USB UVC camera module, min 720p / 30 fps sensor.wrist-camera-optional | sensor | 1 | unpriced | — | Amazon (innomaker)Recommended model in the SO-100/SO-101 wrist-mount guide |
| Cart total · US | 21 | $244.00 | 2 lines unpriced, not in total | |||
Fabricate
Planned for a 256 mm bed- Fabricated parts
- 5
- Print time (sum)
- —
- Material (sum)
- —
- Plates · estimate
- —
No plate estimate: the package does not list grams per part yet, and we will not guess them. Slice the source files for your 256 mm bed.
| Part | Process | Material | Qty | h / part | g / part | Profile |
|---|---|---|---|---|---|---|
Follower part plate, SO_ARM100_08k (Print_Follower_SO_ARM100_08k_Ender.STL, _UP_Prusa.STL, _UP_BambuLabA1Mini_part1/part2.STL or Print_Follower_Bambu_P1P.3mf) printed.follower-plate | FDM | PLA | 1 | — | — | 0.4 mm nozzle at 0.2 mm layers (or 0.6 mm nozzle at 0.4 mm); 13% infill; supports everywhere except slopes steeper than 45°; no supports in horizontal screw holes. 12 individual follower STLs in STL/SO100/Individual/Follower. |
Leader part plate, SO_ARM100_08k (Print_Leader_SO_ARM100_08k_Ender.STL, _UP_Prusa.STL, _UP_BambuLabA1Mini_part1/part2.STL or Print_Leader_Bambu_P1P.3mf), includes handle and trigger printed.leader-plate | FDM | PLA | 1 | — | — | Same as the follower plate. 13 individual leader STLs in STL/SO100/Individual/Leader. |
Fit gauges: Gauge_0 + Gauge_tight_1 (STS3215) or the two Lego size tests printed.gauges | FDM | PLA | 2 | — | — | source |
Wrist camera mount (optional): Wrist_Cam_Mount_32x32_UVC_Module_SO100.stl, replaces the follower Wrist_Roll printed.wrist-cam-mount-optional | FDM | PLA | 1 | — | — | source |
Assemble
Every step ends in a check- Steps
- 13
- Subassemblies
- 8
- Hands-on time (sum)
- —
- Critical path
- —
- Your progress · this device
- —
13 steps have no time estimate; times above are lower bounds.
Steps, in build order
- Fabrication01
Check printer fit, then print both plates
Print Gauge_0 and test it against an STS3215 or a Lego brick. Then print the follower and leader plates for your bed (Ender 220x220, Prusa/UP 205x250, Bambu A1 mini in two parts, or the Bambu P1P .3mf) at 0.2 mm layers, 13% infill, PLA. Remove all supports with a small screwdriver.
CHECKA servo slides snugly into Gauge_0, and every servo pocket and screw hole on the printed parts is free of support material.- Parts in
- Fit gauges: Gauge_0 + Gauge_tight_1 (STS3215) or the two Lego size testsprinted.gauges
- Follower part plate, SO_ARM100_08k (Print_Follower_SO_ARM100_08k_Ender.STL, _UP_Prusa.STL, _UP_BambuLabA1Mini_part1/part2.STL or Print_Follower_Bambu_P1P.3mf)printed.follower-plate
- Leader part plate, SO_ARM100_08k (Print_Leader_SO_ARM100_08k_Ender.STL, _UP_Prusa.STL, _UP_BambuLabA1Mini_part1/part2.STL or Print_Leader_Bambu_P1P.3mf), includes handle and triggerprinted.leader-plate
- Tools
- FDM printer, 220x220 mm bed or larger, PLA filament, Putty knife
- Torque
- —
- Time
- —
- After
- Start
- Source
- github.com
- Software02
Install LeRobot with the Feetech SDK
`conda create -y -n lerobot python=3.12 && conda activate lerobot`, clone https://github.com/huggingface/lerobot, then `pip install -e ".[feetech]"`.
CHECK`lerobot-setup-motors --help` prints its usage.- Parts in
- —
- Tools
- —
- Torque
- —
- Time
- —
- After
- Start
- Source
- huggingface.co
- Motor setup03
Power the boards and find each arm's port
Safety · human-verified requiredSet the Waveshare jumpers to channel `B` (USB), connect the 5 V supply and USB-C, run `lerobot-find-port` and unplug when prompted. Repeat for the second board. On Linux you may need `sudo chmod 666 /dev/ttyACM0 /dev/ttyACM1`.
CHECKEach board reports its own port (e.g. `/dev/ttyACM0` and `/dev/ttyACM1`).This step can hurt a person or ruin parts. Its instructions need sign-off by a human who has done it before relying on them. Stop and ask if anything differs from what you see.
- Parts in
- Motor control board: Waveshare serial bus servo driver (USB-C), one per armelectronics.bus-servo-adapter
- USB-C cable, 2-packcable.usb-c
- DC power supply, 5 V, 5.5x2.1 mm barrel (one per arm)power.psu-5v
- Tools
- —
- Torque
- —
- Time
- —
- After
- 02
- Source
- huggingface.co
- 04
Set follower motor IDs before assembly
Safety · human-verified requiredUnlike the SO-101, SO-100 connectors are hard to reach once assembled, so do this first. `lerobot-setup-motors --robot.type=so100_follower --robot.port=<follower port>`. Connect one servo at a time when prompted (gripper first, then wrist_roll, wrist_flex, elbow_flex, shoulder_lift, shoulder_pan).
CHECKThe script prints `'gripper' motor id set to 6` through shoulder_pan = 1. Label each servo with its ID.This step can hurt a person or ruin parts. Its instructions need sign-off by a human who has done it before relying on them. Stop and ask if anything differs from what you see.
- Parts in
- Feetech STS3215 servo, 7.4 V (6 follower + 6 leader; gears are removed from the 6 leader units)actuator.sts3215
- Tools
- —
- Torque
- —
- Time
- —
- After
- 03
- Source
- huggingface.co
- 05
Set leader motor IDs before assembly
Safety · human-verified required`lerobot-setup-motors --teleop.type=so100_leader --teleop.port=<leader port>` with the same one-servo-at-a-time procedure on the six leader servos.
CHECKIDs 6 to 1 are set without communication errors, and the six leader servos are labelled separately from the follower ones.This step can hurt a person or ruin parts. Its instructions need sign-off by a human who has done it before relying on them. Stop and ask if anything differs from what you see.
- Parts in
- Feetech STS3215 servo, 7.4 V (6 follower + 6 leader; gears are removed from the 6 leader units)actuator.sts3215
- Tools
- —
- Torque
- —
- Time
- —
- After
- 03
- Source
- huggingface.co
- Leader arm06
Remove the gears from the 6 leader servos
Open each leader servo case and remove the gear train as shown in the 'Video removing gears' on the SO-100 docs page, then close the case. The servo then acts only as a position encoder, so the leader can be moved by hand. When fitting horns later, try not to turn the output: without gears it spins freely.
CHECKEach leader servo output turns freely by hand, and the ID set in the previous step still reads back (re-run setup for that motor if not).- Parts in
- Feetech STS3215 servo, 7.4 V (6 follower + 6 leader; gears are removed from the 6 leader units)actuator.sts3215
- Tools
- Phillips #0
- Torque
- —
- Time
- —
- After
- 05
- Source
- huggingface.co
- Follower arm07
Follower motors 1-2: base and shoulder
Insert two 3-pin wires into motor 1, place it in the base and fix with 4 screws (two top, two bottom). Slide on the first motor holder (2 screws), fit both horns (top horn screw), route one wire to the back and one to the left, attach the shoulder with 4 screws top and 4 bottom. Slide in motor 2 from the top and link the wire from motor 1. Add the shoulder motor holder (tight fit: wire 1-2 behind it, the other wire up), fix motor 2 with 4 screws, fit its horns, install the base attachment with 2 screws and the upper arm with 4 screws per side.
CHECKShoulder pan and shoulder lift move by hand without pinching the 1-2 cable behind the holder.- Parts in
- Precision screwdriver set (Phillips)other.screwdriver-set
- Feetech STS3215 servo, 7.4 V (6 follower + 6 leader; gears are removed from the 6 leader units)actuator.sts3215
- Follower part plate, SO_ARM100_08k (Print_Follower_SO_ARM100_08k_Ender.STL, _UP_Prusa.STL, _UP_BambuLabA1Mini_part1/part2.STL or Print_Follower_Bambu_P1P.3mf)printed.follower-plate
- Tools
- Phillips #0, Phillips #1
- Torque
- —
- Time
- —
- Source
- huggingface.co
- 08
Follower motors 3-5: elbow, wrist flex, wrist roll
Route the cable from motor 2 through the cable holder to motor 3, fix with 4 screws, fit horns and connect the forearm with 4 screws per side. Slide in motor 4, connect the cable from motor 3 and screw it in its holder, fit motor holder 4 (tight; one wire up, the one from motor 3 down), fix with 4 screws and fit horns. Insert motor 5 in the wrist holder (2 front screws), connect 4-5 and pre-insert the gripper wire, fix the wrist to motor 4 with 4 screws per side, fit one horn on motor 5.
CHECKElbow and both wrist joints move by hand with cables 2-3, 3-4 and 4-5 connected and not stretched at the range ends.- Parts in
- Feetech STS3215 servo, 7.4 V (6 follower + 6 leader; gears are removed from the 6 leader units)actuator.sts3215
- Follower part plate, SO_ARM100_08k (Print_Follower_SO_ARM100_08k_Ender.STL, _UP_Prusa.STL, _UP_BambuLabA1Mini_part1/part2.STL or Print_Follower_Bambu_P1P.3mf)printed.follower-plate
- Tools
- Phillips #0, Phillips #1
- Torque
- —
- Time
- —
- After
- 07
- Source
- huggingface.co
- Leader arm09
Leader arm: motors 1-5, holder, handle, trigger
Repeat follower steps 1-23 with the de-geared leader servos. Then mount the leader holder on the wrist (1 screw), attach the handle to motor 5 (4 screws), insert the gripper motor (3 screws per side, horn screw, connect the wire), attach the trigger (4 screws) and mount the controller on the back.
CHECKEvery leader joint moves with light finger force and the trigger turns the gripper servo output.- Parts in
- Feetech STS3215 servo, 7.4 V (6 follower + 6 leader; gears are removed from the 6 leader units)actuator.sts3215
- Leader part plate, SO_ARM100_08k (Print_Leader_SO_ARM100_08k_Ender.STL, _UP_Prusa.STL, _UP_BambuLabA1Mini_part1/part2.STL or Print_Leader_Bambu_P1P.3mf), includes handle and triggerprinted.leader-plate
- Motor control board: Waveshare serial bus servo driver (USB-C), one per armelectronics.bus-servo-adapter
- Tools
- Phillips #0, Phillips #1
- Torque
- —
- Time
- —
- Source
- huggingface.co
- Follower arm10
Follower gripper and controller
Attach the gripper to motor 5, insert the gripper motor, connect 5-6 and fix with 3 screws per side. Fit the horns (horn screw) and the claw with 4 screws per side. Mount the motor controller on the back of the base.
CHECKThe claw opens and closes by hand, and the chain runs from the board to ID 1 and on to ID 6.- Parts in
- Feetech STS3215 servo, 7.4 V (6 follower + 6 leader; gears are removed from the 6 leader units)actuator.sts3215
- Follower part plate, SO_ARM100_08k (Print_Follower_SO_ARM100_08k_Ender.STL, _UP_Prusa.STL, _UP_BambuLabA1Mini_part1/part2.STL or Print_Follower_Bambu_P1P.3mf)printed.follower-plate
- Motor control board: Waveshare serial bus servo driver (USB-C), one per armelectronics.bus-servo-adapter
- Tools
- Phillips #0, Phillips #1
- Torque
- —
- Time
- —
- After
- 08
- Source
- huggingface.co
- Calibration11
Calibrate follower and leader
Safety · human-verified requiredClamp both bases. `lerobot-calibrate --robot.type=so100_follower --robot.port=<follower port> --robot.id=my_awesome_follower_arm` then `lerobot-calibrate --teleop.type=so100_leader --teleop.port=<leader port> --teleop.id=my_awesome_leader_arm`. For each: middle-of-range pose, Enter, sweep every joint through its range, Enter. The SO-100 flow is manual; the old auto-calibration was removed upstream.
CHECKBoth runs write a calibration JSON under `~/.cache/huggingface/lerobot/calibration/`, and the recorded ranges look plausible (no joint stuck at a single value).This step can hurt a person or ruin parts. Its instructions need sign-off by a human who has done it before relying on them. Stop and ask if anything differs from what you see.
- Parts in
- Table clamp, 4 pcsother.table-clamps
- Tools
- —
- Torque
- —
- Time
- —
- Source
- huggingface.co
- First motion12
First motion: teleoperate
Safety · human-verified required`lerobot-teleoperate --robot.type=so100_follower --robot.port=<follower port> --robot.id=my_awesome_follower_arm --teleop.type=so100_leader --teleop.port=<leader port> --teleop.id=my_awesome_leader_arm`. Clear the workspace and keep a hand on the follower power plug.
CHECKThe follower mirrors the leader joint for joint in the same direction and the gripper follows the trigger.This step can hurt a person or ruin parts. Its instructions need sign-off by a human who has done it before relying on them. Stop and ask if anything differs from what you see.
- Parts in
- Table clamp, 4 pcsother.table-clamps
- Tools
- —
- Torque
- —
- Time
- —
- After
- 11
- Source
- huggingface.co
- Policy13
Record, train and run a policy
Safety · human-verified requiredMount at least one camera. `lerobot-record --robot.type=so100_follower ... --robot.cameras="{ front: {type: opencv, index_or_path: 0, width: 640, height: 480, fps: 30}}" --teleop.type=so100_leader ... --dataset.repo_id=${HF_USER}/so100_test --dataset.num_episodes=50 --dataset.single_task="<task>"`, then `lerobot-train --dataset.repo_id=${HF_USER}/so100_test --policy.type=act --policy.device=cuda --policy.repo_id=${HF_USER}/my_policy` (or `--policy.path=lerobot/smolvla_base`), then `lerobot-rollout --strategy.type=base --policy.path=${HF_USER}/my_policy --robot.type=so100_follower --robot.port=<port> --robot.cameras="<same as dataset>" --task="<task>" --duration=60`.
CHECKThe dataset is viewable on the Hub, training checkpoints appear under outputs/train/, and in rollout the arm attempts the recorded task from positions seen in training.This step can hurt a person or ruin parts. Its instructions need sign-off by a human who has done it before relying on them. Stop and ask if anything differs from what you see.
- Parts in
- Wrist camera (optional): 32x32 mm USB UVC camera module, min 720p / 30 fpssensor.wrist-camera-optional
- Overhead / scene camera (optional): USB webcamsensor.scene-camera-optional
- Wrist camera mount (optional): Wrist_Cam_Mount_32x32_UVC_Module_SO100.stl, replaces the follower Wrist_Rollprinted.wrist-cam-mount-optional
- Tools
- Hugging Face account, CUDA or Apple-silicon machine, or HF Jobs
- Torque
- —
- Time
- —
- After
- 12
- Source
- huggingface.co
Progress is stored in this browser only (localStorage). Nothing is sent anywhere.
Bring-up
Flash · calibrate · first policy- A
Flash firmware
TargetsFeetech STS3215 servo (EEPROM: ID 1-6 and baudrate via lerobot-setup-motors), Waveshare serial bus servo driver (USB bridge, no user firmware)
Repogithub.com/huggingface/lerobot
Stock Feetech firmware. In lerobot 0.6.x, so100_follower and so101_follower are registered to the same SOFollower config class (lerobot.robots.so_follower), so SO-100 and SO-101 followers share a driver and calibration flow. Datasets and policies recorded before lerobot 0.5 use a different joint calibration convention (see the LeRobot backward-compatibility guide).
- B
Calibrate
Calibrationlerobot-calibrate --robot.type=so100_follower --robot.port=<port> --robot.id=<id>; lerobot-calibrate --teleop.type=so100_leader --teleop.port=<port> --teleop.id=<id>. Middle pose, Enter, sweep all joints, Enter.Log the output. It goes in your build report.
- C
First policy
- SmolVLA base (pretrained VLA to fine-tune on your own SO-100 dataset)LeRobot (SmolVLA) source
- SO-100/101 language-conditioned manipulation (VLA, zero-shot or fine-tune)LeRobot (MolmoAct2) source
Try the policy in the browser sim before it touches hardware. Keep a hand near the power switch the first time a policy runs on the real robot.
Report your build
Moves SO-100 (SO-ARM100) toward L4 · BuiltA build report is the only thing that proves a package works. It raises the level, puts a point on the map, and tells the Foreman which steps to rewrite.
Level gate
Holds L2 · evidence, not confidence- L0Indexed
Known to exist. Atlas page only.
- 3 sources on record(met)
- L1Compiled
Package validates against the spec; every fact has a source.
- Build package compiled(met)
- 16 sources across robot and package(met)
- L2Sim-verified
Loads in browser and GPU sim, mass within tolerance of the BOM, holds a stand. Unlocks .training.
- URDF/MJCF is public(met)
- Sim load, mass tolerance and stand are checked on .training(checked elsewhere)
- L3Sourced
Every BOM line resolves to a live offer in at least two regions. Unlocks the one-click cart.
- 6/8 BOM lines have offers in 2+ regions(not met)
- L4Built
At least one community build report with photos and bring-up logs. Unlocks Build it as the main action.
- 0 reviewed build reports(not met)
- Review feed unreachable at last refresh; count is registry-only(checked elsewhere)
- L5Certified
The robot's maintainer signs the package. Unlocks certified teams and kit sales.
- Maintainer signature not recorded(not met)
Levels are cumulative and set by the registry from reviewed evidence. This panel shows what can be measured from the package today.
Same robot, other verbs
- Know ithumanoidrobots.systems/therobotstudio/so-100
- Build itpartialhumanoidrobot.build/therobotstudio/so-100Discontinued; files public, parts may be hard to source.
- Train ithumanoidrobots.training/therobotstudio/so-100
- Find its crewpartialhumanoidrobots.team/therobotstudio/so-100
- See it on the mappartialhumanoidrobots.earth/therobotstudio/so-100
Revisions and sources
Every fact on this sheet traces to one of these| Rev | Description | Checked |
|---|---|---|
| PKG | Build package, current revision 0.1.0 | — |
| S1 | GitHub repogithub.com | 2026-09-24 |
| S2 | Hackster: SO-101 as next-gen of SO-100hackster.io | 2026-09-24 |
| S3 | LeRobot SO-100 docshuggingface.co | 2026-09-25 |
| S4 | SO-ARM100 SO100.md (BOM, print settings)github.com | 2026-09-25 |
| S5 | SO-ARM100 README (SO-100 marked deprecated, optional hardware)github.com | 2026-09-25 |
| S6 | STL/SO100 (plates and individual parts)github.com | 2026-09-25 |
| S7 | STEP/SO100 CADgithub.com | 2026-09-25 |
| S8 | SO-ARM100 CHANGELOG (SO_ARM100_08k)github.com | 2026-09-25 |
| S9 | LeRobot docs: SO-100huggingface.co | 2026-09-25 |
| S10 | LeRobot docs: imitation learning on real robotshuggingface.co | 2026-09-25 |
| S11 | LeRobot docs: installationhuggingface.co | 2026-09-25 |
| S12 | LeRobot docs: SmolVLAhuggingface.co | 2026-09-25 |
| S13 | LeRobot docs: MolmoAct2huggingface.co | 2026-09-25 |
| S14 | HF model: lerobot/smolvla_basehuggingface.co | 2026-09-25 |
| S15 | HF model: lerobot/MolmoAct2-SO100_101-LeRobothuggingface.co | 2026-09-25 |
| S16 | HF dataset: lerobot/svla_so100_pickplacehuggingface.co | 2026-09-25 |