Build package
Build Poppy Humanoid
Poppy Project (Inria Flowers) · Humanoid · orphaned
Open-source 3D-printed 25-DOF humanoid (~83-85 cm, 3.5 kg) from Inria Bordeaux's Flowers lab for research, education and art.
Build is partial: Files are public but the maker is gone; uncertified, some parts may need alternates.
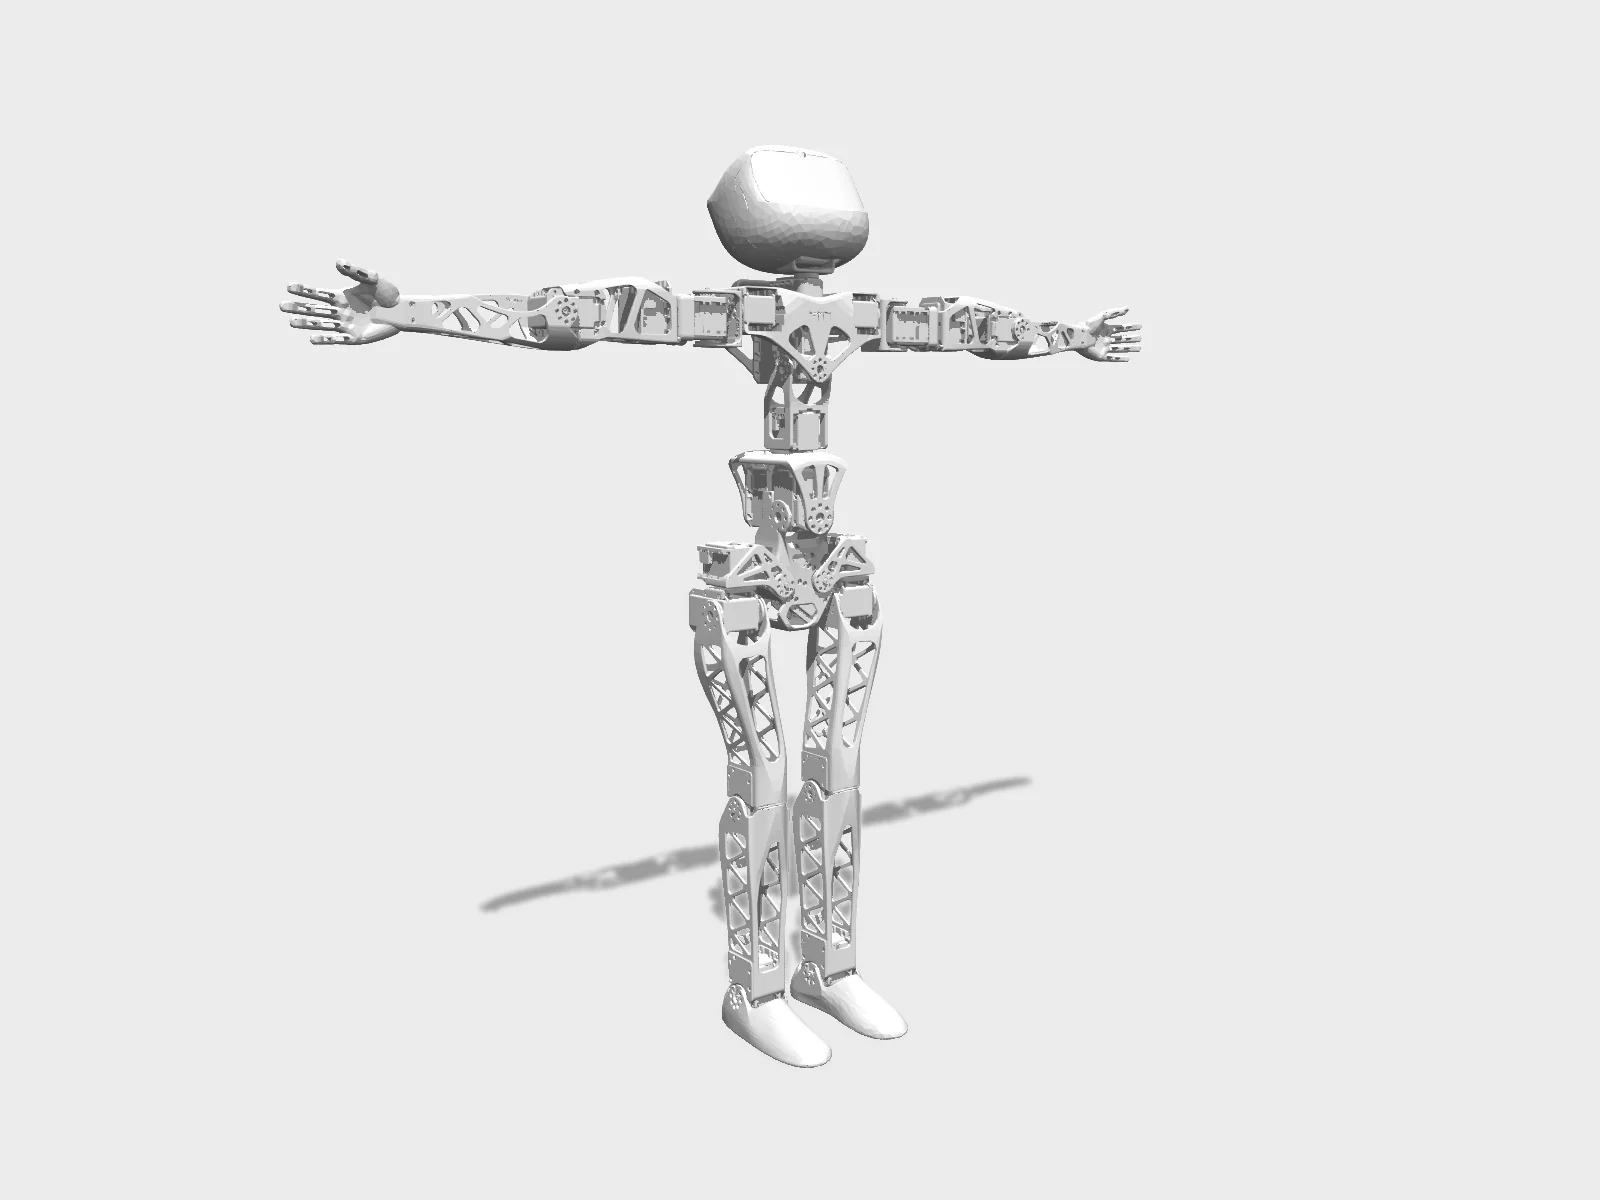
- Drawing
- /poppy/poppy-humanoid
- Maker
- Poppy Project (Inria Flowers)
- Country
- Bordeaux, FR
- Package rev
- v0.1.0
- Level
- L1 Compiled
- Availability
- Kit
- Openness
- 90/100
- HW licence
- CC-BY-SA-4.0
- Last checked
- 2026-09-25
- Height
- 84 cm
- Mass
- 3.5 kg
- DOF
- 25
- Actuators
- Dynamixel: 19 MX-28AT, 4 MX-64AT, 2 AX-12A
Project born 2012 in Inria Flowers lab (Lapeyre PhD); exact public-unveil year not pinned (paper 2014). Main repo last pushed Dec 2021; poppy-project.org failed DNS on fetch (Sep 2026). Lapeyre later co-founded Pollen Robotics. Height quoted as 83 or 85 cm. Actuator mix (19 MX-28AT, 4 MX-64AT, 2 AX-12A) is from the motor configuration file and the archived 1.0 BOM, which agree; the current guide's per-section counts omit the arms. README puts a full build at $8,000-9,000, about 60% of it for the Dynamixels. URDF is in hardware/URDF.
Configure
Saved in the URL. Share the link to share the build.Source
One cart across 1 vendor · prices in USD as listedPoppy Project (Inria Flowers) sells a kit. Buying from the maker funds the people who opened the design. No BOM line below lists them as a vendor yet, so check their store before ordering parts one by one.
32 lines · 104 parts · 31 without an offer in US · 0/32 lines sourced in 2+ regions (L3 gate)
| # | Part | Category | Qty | Unit | Line | Offer |
|---|---|---|---|---|---|---|
Adafruit1 line · $8.95 | ||||||
| 1 | Adafruit Stereo 3.7 W Class D amplifier, MAX98306 electronics.audio-amp · MPN 987 | electronics | 1 | $8.95 | $8.95 | AdafruitProduct cited in the archived BOM; $8.95 read on the product page 2026-09-25. |
No offer in this region31 lines · unpriced | ||||||
| 2 | Robotis Dynamixel MX-28AT (arms, shoulders, bust, abs_z, hips x/z, knees, ankles) actuator.mx28at · 1 alt | actuator | 19 | unpriced | — | Offers in EU only |
| 3 | Robotis Dynamixel MX-64AT (abs_x, abs_y, l/r_hip_y) actuator.mx64at · 1 alt | actuator | 4 | unpriced | — | Offers in EU only |
| 4 | Robotis Dynamixel AX-12A (head_z, head_y) actuator.ax12a · 1 alt | actuator | 2 | unpriced | — | Offers in EU only |
| 5 | Robotis HN07-N101 set (MX-28 active horn) structure.horn.hn07-n101 · MPN HN07-N101 | structure | 19 | unpriced | — | Offers in EU only |
| 6 | Robotis HN07-I101 set (MX-28 idler/free horn with bearing) structure.horn.hn07-i101 · MPN HN07-I101 | structure | 12 | unpriced | — | Offers in EU only |
| 7 | Robotis HN05-N102 set (MX-64 active horn) structure.horn.hn05-n102 · MPN HN05-N102 | structure | 4 | unpriced | — | Offers in EU only |
| 8 | Robotis HN05-I101 set (MX-64 idler/free horn) structure.horn.hn05-i101 · MPN HN05-I101 | structure | 4 | unpriced | — | Offers in EU only |
| 9 | Wrench bolt M2x3, pack of 200 (horn screws, arm/shoulder/spine fixing) fastener.m2x3 | fastener | 1 | unpriced | — | Offers in EU only |
| 10 | Wrench bolt M2.5x4, pack of 200 fastener.m2_5x4 | fastener | 1 | unpriced | — | Offers in EU only |
| 11 | Wrench bolt M2.5x6, pack of 200 (MX case screws) fastener.m2_5x6 | fastener | 1 | unpriced | — | Offers in EU only |
| 12 | Wrench bolt M2.5x8, pack of 200 (MX-28 horn centre screw) fastener.m2_5x8 | fastener | 1 | unpriced | — | Offers in EU only |
| 13 | Robotis BIOLOID Bolt-Nut Set BNS-10 (S1, S2, S-B bolts for AX-12 head; M2x6 for pelvis) fastener.bns10 · MPN BNS-10 | fastener | 1 | unpriced | — | Offers in EU only |
| 14 | Nut M2.5, pack of 400 fastener.nut-m2_5 | fastener | 1 | unpriced | — | Offers in EU only |
| 15 | Robotis N1 nut M2, pack of 400 fastener.nut-m2 | fastener | 1 | unpriced | — | Offers in EU only |
| 16 | Robotis SMPS2Dynamixel power injector (one per bus + spare/config rig) electronics.smps2dynamixel · MPN SMPS2Dynamixel | electronics | 3 | unpriced | — | Offers in EU only |
| 17 | Robotis BIOLOID 3P Extension PCB (Dynamixel hub) electronics.3p-hub | electronics | 3 | unpriced | — | Offers in EU only |
| 18 | Xevelabs USB2AX USB-to-Dynamixel TTL adapter (one per bus) electronics.usb2ax · 1 alt | electronics | 2 | unpriced | — | Offers in EU only |
| 19 | 12 V wall power supply for the Dynamixel buses (Robotis SMPS 12V 5A PS-10 in the archived BOM) power.psu-12v · MPN PS-10 | power | 2 | unpriced | — | Offers in EU only |
| 20 | 5 V micro-USB power supply for the Raspberry Pi 3 power.psu-5v-rpi | power | 1 | unpriced | — | No offer found yet |
| 21 | Robotis Robot Cable-3P 60 mm, pack of 10 cable.3p-60 | cable | 1 | unpriced | — | Offers in EU only |
| 22 | Robotis Robot Cable-3P 100 mm, pack of 10 cable.3p-100 | cable | 1 | unpriced | — | Offers in EU only |
| 23 | Robotis Robot Cable-3P 140 mm, pack of 10 cable.3p-140 | cable | 1 | unpriced | — | Offers in EU only |
| 24 | Robotis Robot Cable-3P 200 mm, pack of 10 cable.3p-200 | cable | 1 | unpriced | — | Offers in EU only |
| 25 | Custom 3P Dynamixel cables: 3x 220 mm, 3x 250 mm, 2x 500 mm cable.3p-custom | cable | 8 | unpriced | — | Offers in EU only |
| 26 | Cable-4P 200 mm with D+/D- wires cut (links the two 12 V buses on a single PSU) cable.4p-200 | cable | 2 | unpriced | — | No offer found yet |
| 27 | Raspberry Pi 3 (head computer, runs pypot + web UI) compute.rpi3 · 2 alt | compute | 1 | unpriced | — | Offers in EU only |
| 28 | microSD card, 8 GB minimum, flashed with the Poppy Humanoid image electronics.sd-card | electronics | 1 | unpriced | — | No offer found yet |
| 29 | USB hub, 4 port electronics.usb-hub | electronics | 1 | unpriced | — | Offers in EU only |
| 30 | Speaker (head) electronics.speaker | electronics | 2 | unpriced | — | Offers in EU only |
| 31 | Head camera (archived BOM: 2 MP USB 'Videw' OV2643 camera, 120° or 170° FOV; current kit: mini Raspberry Pi camera) sensor.camera | sensor | 1 | unpriced | — | Offers in EU only |
| 32 | Thread locker (a dip on the screw tip only) other.threadlocker | other | 1 | unpriced | — | Offers in EU only |
| Cart total · US | 104 | $8.95 | 31 lines unpriced, not in total | |||
Fabricate
Planned for a 256 mm bed- Fabricated parts
- 39
- Print time (sum)
- —
- Material (sum)
- —
- Plates · estimate
- —
No plate estimate: the package does not list grams per part yet, and we will not guess them. Slice the source files for your 256 mm bed.
| Part | Process | Material | Qty | h / part | g / part | Profile |
|---|---|---|---|---|---|---|
pelvis printed.legs.pelvis | SLS | Polyamide (PA12), white, polished | 1 | — | — | source |
hip_left printed.legs.hip-left | SLS | Polyamide, white, polished | 1 | — | — | source |
hip_right printed.legs.hip-right | SLS | Polyamide, white, polished | 1 | — | — | source |
hip_z_to_hip_y-connector printed.legs.hip-connector | SLS | Polyamide, white, polished | 2 | — | — | source |
thigh_left printed.legs.thigh-left | SLS | Polyamide, white, polished | 1 | — | — | source |
thigh_right printed.legs.thigh-right | SLS | Polyamide, white, polished | 1 | — | — | source |
shin (symmetric, 'leg' in the BOM) printed.legs.shin | SLS | Polyamide, white, polished | 2 | — | — | source |
simple_foot_left printed.legs.foot-left | SLS | Polyamide, white, polished | 1 | — | — | source |
simple_foot_right printed.legs.foot-right | SLS | Polyamide, white, polished | 1 | — | — | source |
abdomen printed.trunk.abdomen | SLS | Polyamide, white, polished | 1 | — | — | source |
MX64_double_rotation_link printed.trunk.mx64-link | SLS | Polyamide, white | 2 | — | — | source |
i101_to_MX64_link printed.trunk.i101-mx64-link | SLS | Polyamide, white | 1 | — | — | source |
spine printed.trunk.spine | SLS | Polyamide, white, polished | 1 | — | — | source |
MX28_double_rotation_link printed.trunk.mx28-link | SLS | Polyamide, white | 2 | — | — | source |
i101_to_MX28_link printed.trunk.i101-mx28-link | SLS | Polyamide, white | 1 | — | — | source |
chest printed.trunk.chest | SLS | Polyamide, white, polished | 1 | — | — | source |
shoulder_left printed.arms.shoulder-left | SLS | Polyamide, white, polished | 1 | — | — | source |
shoulder_right printed.arms.shoulder-right | SLS | Polyamide, white, polished | 1 | — | — | source |
arm_connector printed.arms.arm-connector | SLS | Polyamide, white, polished | 2 | — | — | source |
upper_arm (same part both sides) printed.arms.upper-arm | SLS | Polyamide, white, polished | 2 | — | — | source |
forearm_left printed.arms.forearm-left | SLS | Polyamide, white, polished | 1 | — | — | source |
forearm_right printed.arms.forearm-right | SLS | Polyamide, white, polished | 1 | — | — | source |
hand_left printed.arms.hand-left | SLS | Polyamide, white, polished | 1 | — | — | source |
hand_right printed.arms.hand-right | SLS | Polyamide, white, polished | 1 | — | — | source |
neck (U-shaped) printed.head.neck | SLS | Polyamide, white, polished | 1 | — | — | source |
head_back printed.head.back | SLS | Polyamide, white, polished | 1 | — | — | source |
head_face printed.head.face | SLS | Polyamide, white, polished | 1 | — | — | source |
camera_support printed.head.camera-support | SLS | Polyamide, white | 1 | — | — | source |
screen (transparent cover) printed.head.screen | SLA | Transparent resin | 1 | — | — | source |
screen_support printed.head.screen-support | SLS | Polyamide (colour not stated; the archived BOM lists a black 'hide-screen' instead) | 1 | — | — | source |
fake_manga_screen (replaces the discontinued Manga Screen) printed.head.fake-manga-screen | SLS | Polyamide, black | 1 | — | — | source |
speaker_left support printed.head.speaker-left | SLS | Polyamide, black | 1 | — | — | source |
speaker_right support printed.head.speaker-right | SLS | Polyamide, black | 1 | — | — | source |
Assemble
Every step ends in a check- Steps
- 22
- Subassemblies
- 8
- Hands-on time (sum)
- —
- Critical path
- —
- Your progress · this device
- —
22 steps have no time estimate; times above are lower bounds.
Steps, in build order
- Fabrication01
Print the 33 STL files (39 parts)
Download STL_3D_printed_parts.zip from the 1.0.2 release (folders arms/, head/, legs/, trunk/). The reference parts are SLS polyamide, and the transparent screen is resin. Print 2x shin, 2x hip connector, 2x MX-28 and 2x MX-64 double-rotation links, 2x arm connector and 2x upper arm; every other file is printed once. Don't clone the repo without git-lfs, because the CAD files come down as empty pointers.
CHECK39 parts on the bench, split legs 11 / trunk 9 / arms 10 / head 9. On each part, the three alignment dots next to the motor axes are visible.- Parts in
- pelvisprinted.legs.pelvis
- hip_leftprinted.legs.hip-left
- hip_rightprinted.legs.hip-right
- hip_z_to_hip_y-connectorprinted.legs.hip-connector
- thigh_leftprinted.legs.thigh-left
- thigh_rightprinted.legs.thigh-right
- shin (symmetric, 'leg' in the BOM)printed.legs.shin
- simple_foot_leftprinted.legs.foot-left
- simple_foot_rightprinted.legs.foot-right
- abdomenprinted.trunk.abdomen
- MX64_double_rotation_linkprinted.trunk.mx64-link
- i101_to_MX64_linkprinted.trunk.i101-mx64-link
- spineprinted.trunk.spine
- MX28_double_rotation_linkprinted.trunk.mx28-link
- i101_to_MX28_linkprinted.trunk.i101-mx28-link
- chestprinted.trunk.chest
- shoulder_leftprinted.arms.shoulder-left
- shoulder_rightprinted.arms.shoulder-right
- arm_connectorprinted.arms.arm-connector
- upper_arm (same part both sides)printed.arms.upper-arm
- forearm_leftprinted.arms.forearm-left
- forearm_rightprinted.arms.forearm-right
- hand_leftprinted.arms.hand-left
- hand_rightprinted.arms.hand-right
- neck (U-shaped)printed.head.neck
- head_backprinted.head.back
- head_faceprinted.head.face
- camera_supportprinted.head.camera-support
- screen (transparent cover)printed.head.screen
- screen_supportprinted.head.screen-support
- fake_manga_screen (replaces the discontinued Manga Screen)printed.head.fake-manga-screen
- speaker_left supportprinted.head.speaker-left
- speaker_right supportprinted.head.speaker-right
- Tools
- —
- Torque
- —
- Time
- —
- After
- Start
- Source
- github.com
- Preparation02
Build the single-motor configuration rig and install Poppy Configure
Safety · human-verified requiredWire USB2AX to SMPS2Dynamixel to one motor with two 3P cables, then plug the 12 V supply into the SMPS. On Linux, add your user to the dialout (or uucp) group and log in again. Configure each motor right before you mount it, with `poppy-configure humanoid <motor-name>`. This sets the ID from the naming convention, 1,000,000 bps and a 0 return delay. Herborist and Dynamixel Wizard do the same job.
CHECK`poppy-configure humanoid bust_x` on a new motor (ID 1, 57600 bps) finishes without error, and a scan then finds the motor at ID 35 and 1 Mbps.This step can hurt a person or ruin parts. Its instructions need sign-off by a human who has done it before relying on them. Stop and ask if anything differs from what you see.
- Parts in
- Xevelabs USB2AX USB-to-Dynamixel TTL adapter (one per bus)electronics.usb2ax
- Robotis SMPS2Dynamixel power injector (one per bus + spare/config rig)electronics.smps2dynamixel
- 12 V wall power supply for the Dynamixel buses (Robotis SMPS 12V 5A PS-10 in the archived BOM)power.psu-12v
- Robotis Robot Cable-3P 200 mm, pack of 10cable.3p-200
- Tools
- Computer running Linux, Windows or macOS, pip install poppy-humanoid
- Torque
- —
- Time
- —
- After
- Start
- Source
- github.com
- 03
Horn mounting rules (applies to every motor)
Mount each horn when its motor is needed, not all at once. MX-28 active horns are press-fit and can't be removed without damaging the motor, so align the horn marking with the axis before pressing. Then fix it with the long centre screw and a dip (not a drop) of thread locker. Match the three dots on the horn with the three dots on the printed part. Free horns only need to spin freely.
CHECKAfter `poppy-configure` sends the motor to 0°, the single dot on the active horn points straight up, and each free horn spins freely by hand.- Parts in
- Robotis HN07-N101 set (MX-28 active horn)structure.horn.hn07-n101
- Robotis HN07-I101 set (MX-28 idler/free horn with bearing)structure.horn.hn07-i101
- Robotis HN05-N102 set (MX-64 active horn)structure.horn.hn05-n102
- Robotis HN05-I101 set (MX-64 idler/free horn)structure.horn.hn05-i101
- Wrench bolt M2.5x8, pack of 200 (MX-28 horn centre screw)fastener.m2_5x8
- Thread locker (a dip on the screw tip only)other.threadlocker
- Tools
- Allen keys 1.5 / 2 / 2.5 mm, Tweezers, Flat pliers
- Torque
- —
- Time
- —
- After
- 02
- Source
- github.com
- Bring-up04
Simulation: V-REP/CoppeliaSim scene and URDF
The poppy-humanoid package ships a V-REP scene (vrep-scene/poppy_humanoid.ttt). `PoppyHumanoid(simulator='vrep')` drives it through pypot. A URDF with meshes and ROS display/Gazebo launch files is in hardware/URDF. The sample notebook 'Controlling a Poppy humanoid in V-REP using pypot' walks through it.
CHECKWith the scene open in V-REP, the notebook connects and `poppy.motors` lists 25 motors that move in the simulator.- Parts in
- —
- Tools
- —
- Torque
- —
- Time
- —
- After
- 01
- Source
- github.com
- Arms05
Right arm: r_shoulder_x (52), r_arm_z (53), r_elbow_y (54)
Join the hand to the forearm (4 M2 nuts, 4 S1 bolts). Put nuts in r_elbow_y, run a 140 mm cable into the upper arm and fix the motor with 18 M2.5 bolts. Add r_arm_z on top, then the arm connector and forearm with 22 M2x3 bolts. Finally fix r_shoulder_x to the arm connector with 8 M2.5 bolts and link it with the 200 mm cable. Videos 1-4 of the assembly playlist.
CHECKAll three motors are chained and the parts per arm are used up (22 M2x3, 26 M2.5x6, 13 M2.5 nuts). Rotating each joint by hand shows no rubbing and no cable pinch.- Parts in
- Robotis Dynamixel MX-28AT (arms, shoulders, bust, abs_z, hips x/z, knees, ankles)actuator.mx28at
- hand_rightprinted.arms.hand-right
- forearm_rightprinted.arms.forearm-right
- upper_arm (same part both sides)printed.arms.upper-arm
- arm_connectorprinted.arms.arm-connector
- Robotis HN07-N101 set (MX-28 active horn)structure.horn.hn07-n101
- Robotis HN07-I101 set (MX-28 idler/free horn with bearing)structure.horn.hn07-i101
- Wrench bolt M2x3, pack of 200 (horn screws, arm/shoulder/spine fixing)fastener.m2x3
- Wrench bolt M2.5x6, pack of 200 (MX case screws)fastener.m2_5x6
- Nut M2.5, pack of 400fastener.nut-m2_5
- Robotis N1 nut M2, pack of 400fastener.nut-m2
- Robotis BIOLOID Bolt-Nut Set BNS-10 (S1, S2, S-B bolts for AX-12 head; M2x6 for pelvis)fastener.bns10
- Robotis Robot Cable-3P 140 mm, pack of 10cable.3p-140
- Robotis Robot Cable-3P 200 mm, pack of 10cable.3p-200
- Tools
- —
- Torque
- —
- Time
- —
- Source
- github.com
- 06
Left arm: l_shoulder_x (42), l_arm_z (43), l_elbow_y (44)
Mirror of the right arm with IDs 42/43/44 (videos 5-8). The guide text still says `r_elbow_y` in the first line of the left-arm steps; that is a typo, the motor is l_elbow_y.
CHECKA scan on the arm's cable finds exactly IDs 42, 43, 44, and all hardware counts match the arm BOM.- Parts in
- Robotis Dynamixel MX-28AT (arms, shoulders, bust, abs_z, hips x/z, knees, ankles)actuator.mx28at
- hand_leftprinted.arms.hand-left
- forearm_leftprinted.arms.forearm-left
- upper_arm (same part both sides)printed.arms.upper-arm
- arm_connectorprinted.arms.arm-connector
- Robotis HN07-N101 set (MX-28 active horn)structure.horn.hn07-n101
- Robotis HN07-I101 set (MX-28 idler/free horn with bearing)structure.horn.hn07-i101
- Wrench bolt M2x3, pack of 200 (horn screws, arm/shoulder/spine fixing)fastener.m2x3
- Wrench bolt M2.5x6, pack of 200 (MX case screws)fastener.m2_5x6
- Nut M2.5, pack of 400fastener.nut-m2_5
- Robotis N1 nut M2, pack of 400fastener.nut-m2
- Robotis BIOLOID Bolt-Nut Set BNS-10 (S1, S2, S-B bolts for AX-12 head; M2x6 for pelvis)fastener.bns10
- Robotis Robot Cable-3P 140 mm, pack of 10cable.3p-140
- Robotis Robot Cable-3P 200 mm, pack of 10cable.3p-200
- Tools
- —
- Torque
- —
- Time
- —
- Source
- github.com
- Torso07
Chest: head_z (36, AX-12A), l_shoulder_y (41), r_shoulder_y (51)
Fit 10 M2 nuts under the AX-12A and bolt it on top of the chest with a 100 mm cable routed through the gap. Slide both shoulder_y MX-28ATs into their slots (8 M2.5 bolts each) and link them with a 140 mm cable. Plug the three cables into the 3P PCB hub and hot-glue the hub behind the chest above the Poppy logo.
CHECKThe hub carries three cables, and a scan through it finds IDs 36, 41 and 51.- Parts in
- chestprinted.trunk.chest
- Robotis Dynamixel AX-12A (head_z, head_y)actuator.ax12a
- Robotis Dynamixel MX-28AT (arms, shoulders, bust, abs_z, hips x/z, knees, ankles)actuator.mx28at
- Robotis HN07-N101 set (MX-28 active horn)structure.horn.hn07-n101
- Robotis BIOLOID 3P Extension PCB (Dynamixel hub)electronics.3p-hub
- Robotis Robot Cable-3P 100 mm, pack of 10cable.3p-100
- Robotis Robot Cable-3P 140 mm, pack of 10cable.3p-140
- Robotis N1 nut M2, pack of 400fastener.nut-m2
- Wrench bolt M2.5x6, pack of 200 (MX case screws)fastener.m2_5x6
- Tools
- Hot glue gun
- Torque
- —
- Time
- —
- Source
- github.com
- 08
Double MX-28 (bust): bust_y (34), bust_x (35)
Put a spare HN07-I101 on the i101-Set_to_MX28_link. Fix the two double_rotation_MX28_links to bust_x, link both motors with the 60 mm cable, and join them at 90° with 4 M2.5 bolts.
CHECKThe two motor axes are at 90°, both motors answer (IDs 34, 35), and the idler turns freely.- Parts in
- Robotis Dynamixel MX-28AT (arms, shoulders, bust, abs_z, hips x/z, knees, ankles)actuator.mx28at
- MX28_double_rotation_linkprinted.trunk.mx28-link
- i101_to_MX28_linkprinted.trunk.i101-mx28-link
- Robotis HN07-N101 set (MX-28 active horn)structure.horn.hn07-n101
- Robotis HN07-I101 set (MX-28 idler/free horn with bearing)structure.horn.hn07-i101
- Robotis Robot Cable-3P 60 mm, pack of 10cable.3p-60
- Nut M2.5, pack of 400fastener.nut-m2_5
- Wrench bolt M2.5x6, pack of 200 (MX case screws)fastener.m2_5x6
- Tools
- —
- Torque
- —
- Time
- —
- Source
- github.com
- 09
Double MX-64 (abs): abs_y (31), abs_x (32)
There are no written instructions for this step, only a video (playlist #9). Parts: 2 HN05-N102, 2 HN05-I101, 13 M2.5 nuts, 12 M2.5x6, 1 M2.5x8, 100 mm cable.
CHECKThe two MX-64 axes are at 90° and both answer (IDs 31, 32).- Parts in
- Robotis Dynamixel MX-64AT (abs_x, abs_y, l/r_hip_y)actuator.mx64at
- MX64_double_rotation_linkprinted.trunk.mx64-link
- i101_to_MX64_linkprinted.trunk.i101-mx64-link
- Robotis HN05-N102 set (MX-64 active horn)structure.horn.hn05-n102
- Robotis HN05-I101 set (MX-64 idler/free horn)structure.horn.hn05-i101
- Robotis Robot Cable-3P 100 mm, pack of 10cable.3p-100
- Nut M2.5, pack of 400fastener.nut-m2_5
- Wrench bolt M2.5x6, pack of 200 (MX case screws)fastener.m2_5x6
- Wrench bolt M2.5x8, pack of 200 (MX-28 horn centre screw)fastener.m2_5x8
- Tools
- —
- Torque
- —
- Time
- —
- Source
- github.com
- Legs10
Pelvis: l_hip_x (11), r_hip_x (21)
Follow the Poppy-lightweight-biped-legs pelvis instructions and video. Use the M2x6 screws from the BNS-10 set where the instructions show M2x5.
CHECKBoth hip_x motors answer (IDs 11, 21) and the pelvis sits flat with both horns aligned on their dots.- Parts in
- pelvisprinted.legs.pelvis
- Robotis Dynamixel MX-28AT (arms, shoulders, bust, abs_z, hips x/z, knees, ankles)actuator.mx28at
- Robotis HN07-N101 set (MX-28 active horn)structure.horn.hn07-n101
- Robotis HN07-I101 set (MX-28 idler/free horn with bearing)structure.horn.hn07-i101
- Robotis BIOLOID Bolt-Nut Set BNS-10 (S1, S2, S-B bolts for AX-12 head; M2x6 for pelvis)fastener.bns10
- Tools
- —
- Torque
- —
- Time
- —
- Source
- github.com
- 11
Left leg: l_hip_z (12), l_hip_y (13, MX-64AT), l_knee_y (14), l_ankle_y (15)
Assemble the hip, thigh and shin sub-assemblies, then the full leg, following the biped-legs sub-guides and their videos. The hip alone uses 12 M2.5 nuts, 12 M2.5x6 and 8 M2x3. Generation Robots kits include 220 mm cables to use in place of the short 200 mm ones.
CHECKThe leg chain answers IDs 12-15, and the knee folds from straight to fully bent by hand without the cable pulling.- Parts in
- hip_leftprinted.legs.hip-left
- hip_z_to_hip_y-connectorprinted.legs.hip-connector
- thigh_leftprinted.legs.thigh-left
- shin (symmetric, 'leg' in the BOM)printed.legs.shin
- simple_foot_leftprinted.legs.foot-left
- Robotis Dynamixel MX-28AT (arms, shoulders, bust, abs_z, hips x/z, knees, ankles)actuator.mx28at
- Robotis Dynamixel MX-64AT (abs_x, abs_y, l/r_hip_y)actuator.mx64at
- Robotis HN07-N101 set (MX-28 active horn)structure.horn.hn07-n101
- Robotis HN07-I101 set (MX-28 idler/free horn with bearing)structure.horn.hn07-i101
- Robotis HN05-N102 set (MX-64 active horn)structure.horn.hn05-n102
- Robotis HN05-I101 set (MX-64 idler/free horn)structure.horn.hn05-i101
- Wrench bolt M2.5x6, pack of 200 (MX case screws)fastener.m2_5x6
- Wrench bolt M2x3, pack of 200 (horn screws, arm/shoulder/spine fixing)fastener.m2x3
- Nut M2.5, pack of 400fastener.nut-m2_5
- Robotis Robot Cable-3P 100 mm, pack of 10cable.3p-100
- Custom 3P Dynamixel cables: 3x 220 mm, 3x 250 mm, 2x 500 mmcable.3p-custom
- Tools
- —
- Torque
- —
- Time
- —
- Source
- github.com
- 12
Right leg: r_hip_z (22), r_hip_y (23, MX-64AT), r_knee_y (24), r_ankle_y (25)
Mirror of the left leg, following the right hip, thigh, shin and leg sub-guides in Poppy-lightweight-biped-legs.
CHECKThe leg chain answers IDs 22-25 and the foot sole is parallel to the pelvis plate at the 0° pose.- Parts in
- hip_rightprinted.legs.hip-right
- hip_z_to_hip_y-connectorprinted.legs.hip-connector
- thigh_rightprinted.legs.thigh-right
- shin (symmetric, 'leg' in the BOM)printed.legs.shin
- simple_foot_rightprinted.legs.foot-right
- Robotis Dynamixel MX-28AT (arms, shoulders, bust, abs_z, hips x/z, knees, ankles)actuator.mx28at
- Robotis Dynamixel MX-64AT (abs_x, abs_y, l/r_hip_y)actuator.mx64at
- Robotis HN07-N101 set (MX-28 active horn)structure.horn.hn07-n101
- Robotis HN07-I101 set (MX-28 idler/free horn with bearing)structure.horn.hn07-i101
- Robotis HN05-N102 set (MX-64 active horn)structure.horn.hn05-n102
- Robotis HN05-I101 set (MX-64 idler/free horn)structure.horn.hn05-i101
- Wrench bolt M2.5x6, pack of 200 (MX case screws)fastener.m2_5x6
- Wrench bolt M2x3, pack of 200 (horn screws, arm/shoulder/spine fixing)fastener.m2x3
- Nut M2.5, pack of 400fastener.nut-m2_5
- Robotis Robot Cable-3P 100 mm, pack of 10cable.3p-100
- Custom 3P Dynamixel cables: 3x 220 mm, 3x 250 mm, 2x 500 mmcable.3p-custom
- Tools
- —
- Torque
- —
- Time
- —
- Source
- github.com
- Torso13
Spine: abs_z (33), then join bust and chest
Slide abs_z with a 200 mm cable into the spine (8 M2.5 bolts). Fix the double MX-28 to the spine with 16 M2 bolts, fix the i101 link to bust_x, then fix the chest with 16 M2 bolts, logo to the front and spine curve to the rear. Plug bust_x into the hub.
CHECKThe Poppy logo faces the same way as the front of abs_z, and a scan from the hub finds IDs 33-36, 41 and 51.- Parts in
- spineprinted.trunk.spine
- Robotis Dynamixel MX-28AT (arms, shoulders, bust, abs_z, hips x/z, knees, ankles)actuator.mx28at
- Robotis HN07-N101 set (MX-28 active horn)structure.horn.hn07-n101
- Robotis Robot Cable-3P 200 mm, pack of 10cable.3p-200
- Wrench bolt M2x3, pack of 200 (horn screws, arm/shoulder/spine fixing)fastener.m2x3
- Wrench bolt M2.5x4, pack of 200fastener.m2_5x4
- Wrench bolt M2.5x6, pack of 200 (MX case screws)fastener.m2_5x6
- Nut M2.5, pack of 400fastener.nut-m2_5
- Tools
- Hot glue gun
- Torque
- —
- Time
- —
- Source
- github.com
- Legs14
Join both legs to the pelvis
Follow the legs/pelvis assembly instructions in Poppy-lightweight-biped-legs. The lower-body bus has its own hub, SMPS2Dynamixel and USB2AX.
CHECKA scan of the lower bus finds exactly 10 motors: 11-15 and 21-25.- Parts in
- Robotis BIOLOID 3P Extension PCB (Dynamixel hub)electronics.3p-hub
- Robotis SMPS2Dynamixel power injector (one per bus + spare/config rig)electronics.smps2dynamixel
- Tools
- —
- Torque
- —
- Time
- —
- Source
- github.com
- Torso15
Full trunk: abdomen and double MX-64
Fix the abdomen to abs_z. Insert the double MX-64 with abs_y to the front, abs_x to the rear, and abs_z slightly forward of centre. Hot-glue the SMPS2Dynamixel at the rear. Video: 'Full trunk assembly' (#13).
CHECKabs_y is at the front, and the torso bends forward/back (abs_y) and sideways (abs_x) by hand without collision.- Parts in
- abdomenprinted.trunk.abdomen
- Robotis SMPS2Dynamixel power injector (one per bus + spare/config rig)electronics.smps2dynamixel
- Tools
- Hot glue gun
- Torque
- —
- Time
- —
- Source
- github.com
- 16
Final torso: shoulders and both arms
Connect the SMPS2Dynamixel to the last hub port with a 60 mm cable. Fix the shoulders with 16 M2x3 bolts, then each arm with 32 M2x3 bolts. Each arm must stand perpendicular to the body with its three dots matched. Video #14.
CHECKAt the 0° pose, both arms hang perpendicular to the shoulder plate. A scan of the upper bus finds 14 motors (31-36, 41-44, 51-54); head_y (37) is added later.- Parts in
- shoulder_leftprinted.arms.shoulder-left
- shoulder_rightprinted.arms.shoulder-right
- Wrench bolt M2x3, pack of 200 (horn screws, arm/shoulder/spine fixing)fastener.m2x3
- Robotis Robot Cable-3P 200 mm, pack of 10cable.3p-200
- Robotis Robot Cable-3P 60 mm, pack of 10cable.3p-60
- Robotis SMPS2Dynamixel power injector (one per bus + spare/config rig)electronics.smps2dynamixel
- Tools
- —
- Torque
- —
- Time
- —
- Source
- github.com
- Legs17
Mount the torso on the legs
Join the torso's abdomen to the pelvis as shown in the legs/torso video (the guide gives 5 min prep and 5-10 min assembly).
CHECKThe robot stands on a stand with the torso upright, and abs_y/abs_x move by hand without touching the pelvis.- Parts in
- —
- Tools
- —
- Torque
- —
- Time
- —
- Source
- github.com
- Head18
Head: head_y (37, AX-12A), Raspberry Pi 3, speakers, camera
Fix the neck to head_y (4 S1 bolts) and head_y to the neck (4 S1 and 1 S-B). Plug head_y into the chest hub, and fix the head back with head_y at zero, horn and case marks aligned. Fit the screen, screen support, fake screen, camera support and speakers, then mount the Pi 3 on its four pillars, ports facing the rear. Leave the head face off until first startup works.
CHECKhead_y answers at ID 37. At 0° the head faces forward, level with the chest, and the Pi's USB/Ethernet ports face the rear.- Parts in
- neck (U-shaped)printed.head.neck
- head_backprinted.head.back
- screen (transparent cover)printed.head.screen
- screen_supportprinted.head.screen-support
- fake_manga_screen (replaces the discontinued Manga Screen)printed.head.fake-manga-screen
- camera_supportprinted.head.camera-support
- speaker_left supportprinted.head.speaker-left
- speaker_right supportprinted.head.speaker-right
- Robotis Dynamixel AX-12A (head_z, head_y)actuator.ax12a
- Raspberry Pi 3 (head computer, runs pypot + web UI)compute.rpi3
- Speaker (head)electronics.speaker
- Adafruit Stereo 3.7 W Class D amplifier, MAX98306electronics.audio-amp
- Head camera (archived BOM: 2 MP USB 'Videw' OV2643 camera, 120° or 170° FOV; current kit: mini Raspberry Pi camera)sensor.camera
- Robotis BIOLOID Bolt-Nut Set BNS-10 (S1, S2, S-B bolts for AX-12 head; M2x6 for pelvis)fastener.bns10
- Robotis N1 nut M2, pack of 400fastener.nut-m2
- Nut M2.5, pack of 400fastener.nut-m2_5
- Wrench bolt M2.5x6, pack of 200 (MX case screws)fastener.m2_5x6
- Robotis Robot Cable-3P 140 mm, pack of 10cable.3p-140
- Tools
- —
- Torque
- —
- Time
- —
- After
- 16
- Source
- github.com
- Electrical19
Wiring: two independent Dynamixel buses
Safety · human-verified requiredUpper bus runs from head_y to abs_x, lower bus from the hip_z motors to the ankles. Each bus has its own SMPS2Dynamixel, 12 V supply, hub and USB2AX, and both USB2AX plug into the Pi. With only one 12 V supply, the 4P cable with its data wires cut can bridge the two power buses. Plug in the two 12 V leads and the 5 V Pi lead, but don't connect them to the wall yet. If the bus is noisy, cut the centre (+12 V) wire of the cable at the USB2AX only.
CHECKWith everything unpowered, continuity shows no data line shared between the two buses. Each USB2AX leads to exactly one bus.This step can hurt a person or ruin parts. Its instructions need sign-off by a human who has done it before relying on them. Stop and ask if anything differs from what you see.
- Parts in
- Xevelabs USB2AX USB-to-Dynamixel TTL adapter (one per bus)electronics.usb2ax
- Robotis SMPS2Dynamixel power injector (one per bus + spare/config rig)electronics.smps2dynamixel
- Robotis BIOLOID 3P Extension PCB (Dynamixel hub)electronics.3p-hub
- 12 V wall power supply for the Dynamixel buses (Robotis SMPS 12V 5A PS-10 in the archived BOM)power.psu-12v
- 5 V micro-USB power supply for the Raspberry Pi 3power.psu-5v-rpi
- USB hub, 4 portelectronics.usb-hub
- Cable-4P 200 mm with D+/D- wires cut (links the two 12 V buses on a single PSU)cable.4p-200
- Tools
- —
- Torque
- —
- Time
- —
- Source
- github.com
- Bring-up20
Write the Poppy Humanoid SD image
Write 2020-10-23-poppy-humanoid.img.7z (release 3.0.0, latest stable) or 2021-07-30-poppy-humanoid.img.7z (4.0.0-beta, adds Scratch and a new REST API) to an SD card of 8 GB or more. The DIY route is `pip install poppy-humanoid` on your own OS.
CHECKThe Pi boots and the Wi-Fi network 'Poppy-Hotspot' appears (password poppyproject).- Parts in
- microSD card, 8 GB minimum, flashed with the Poppy Humanoid imageelectronics.sd-card
- Raspberry Pi 3 (head computer, runs pypot + web UI)compute.rpi3
- Tools
- SD card writer (e.g. Etcher)
- Torque
- —
- Time
- —
- After
- 18
- Source
- github.com
- 21
First power-on and motor detection
Safety · human-verified requiredKeep the robot on a stand and the head open. Plug in both 12 V supplies and the 5 V Pi supply, then open http://poppy.local (Windows needs Bonjour). Look at the 'What happened' log: the software reports missing, extra or duplicate motors if the wiring is wrong.
CHECKhttp://poppy.local loads, the 'What happened' log shows the robot started with no missing-motor error, and Monitor and Control lists all 25 motors.This step can hurt a person or ruin parts. Its instructions need sign-off by a human who has done it before relying on them. Stop and ask if anything differs from what you see.
- Parts in
- 12 V wall power supply for the Dynamixel buses (Robotis SMPS 12V 5A PS-10 in the archived BOM)power.psu-12v
- 5 V micro-USB power supply for the Raspberry Pi 3power.psu-5v-rpi
- Tools
- —
- Torque
- —
- Time
- —
- Source
- github.com
- 22
First motion: stand_position / sit_position primitives
Safety · human-verified requiredFrom Monitor and Control or Python (`from poppy_humanoid import PoppyHumanoid; poppy = PoppyHumanoid(); poppy.stand_position.start()`), run the built-in posture primitives. temperature_monitoring and limit_torque are attached automatically. If a horn was pressed on misaligned, correct its offset in poppy_humanoid.json. After debugging, close the head face with 3 M2 nuts and 3 S2 bolts.
CHECKstand_position brings every joint to within a few degrees of 0° with no joint hitting a hard stop, and sit_position runs back without a DxlError or timeout.This step can hurt a person or ruin parts. Its instructions need sign-off by a human who has done it before relying on them. Stop and ask if anything differs from what you see.
- Parts in
- —
- Tools
- —
- Torque
- —
- Time
- —
- After
- 21
- Source
- github.com
Progress is stored in this browser only (localStorage). Nothing is sent anywhere.
Bring-up
Flash · calibrate · first policy- A
Flash firmware
TargetsRaspberry Pi 3/4 (Poppy Humanoid SD image, pypot + poppy-humanoid), Dynamixel MX-28AT / MX-64AT / AX-12A (stock Robotis firmware, configured at 1 Mbps)
Repogithub.com/poppy-project/pypot
There is no custom motor firmware: stock Robotis Dynamixel firmware runs on Protocol 1.0 buses, one per body half (upper_body_controller and lower_body_controller). The controller is pypot 5.0.2 (PyPI, 2022-03-10) with the poppy-humanoid 3.0.0 package (PyPI). SD images: releases 3.0.0 (2020-11-03, Raspberry Pi 3/4, Python 3) and 4.0.0-beta (2021-07-29). The web UI (poppy.local) offers Snap!, Scratch, Jupyter/Python and Monitor and Control.
- B
Calibrate
Calibration`poppy-configure humanoid <motor-name>` sets each motor's ID, 1,000,000 bps baud and 0 return delay, then sends it to 0° to check horn alignment. Per-motor offsets and angle limits are in software/poppy_humanoid/configuration/poppy_humanoid.json.Log the output. It goes in your build report.
- C
First policy
- Stand / sit posture (scripted primitives)pypot primitives (Python) source
- Dance beat, upper-body and head idle motion (scripted)pypot LoopPrimitive source
- Safety: torque limiting and temperature monitoringpypot LoopPrimitive source
Try the policy in the browser sim before it touches hardware. Keep a hand near the power switch the first time a policy runs on the real robot.
Report your build
Moves Poppy Humanoid toward L4 · BuiltA build report is the only thing that proves a package works. It raises the level, puts a point on the map, and tells the Foreman which steps to rewrite.
Level gate
Holds L1 · evidence, not confidence- L0Indexed
Known to exist. Atlas page only.
- 6 sources on record(met)
- L1Compiled
Package validates against the spec; every fact has a source.
- Build package compiled(met)
- 32 sources across robot and package(met)
- L2Sim-verified
Loads in browser and GPU sim, mass within tolerance of the BOM, holds a stand. Unlocks .training.
- URDF/MJCF is public(met)
- Sim load, mass tolerance and stand are checked on .training(checked elsewhere)
- L3Sourced
Every BOM line resolves to a live offer in at least two regions. Unlocks the one-click cart.
- 0/32 BOM lines have offers in 2+ regions(not met)
- L4Built
At least one community build report with photos and bring-up logs. Unlocks Build it as the main action.
- 0 reviewed build reports(not met)
- Review feed unreachable at last refresh; count is registry-only(checked elsewhere)
- L5Certified
The robot's maintainer signs the package. Unlocks certified teams and kit sales.
- Orphaned: no maintainer left to sign(not met)
Levels are cumulative and set by the registry from reviewed evidence. This panel shows what can be measured from the package today.
Same robot, other verbs
- Know ithumanoidrobots.systems/poppy/poppy-humanoid
- Build itpartialhumanoidrobot.build/poppy/poppy-humanoidFiles are public but the maker is gone; uncertified, some parts may need alternates.
- Train ithumanoidrobots.training/poppy/poppy-humanoid
- Find its crewpartialhumanoidrobots.team/poppy/poppy-humanoid
- See it on the mappartialhumanoidrobots.earth/poppy/poppy-humanoid